Si vous suivez les bonnes personnes Oracle, vous savez probablement déjà qu'Oracle vient de publier Oracle Linux Automation Manager :
Votre moteur d'automatisation #Ansible est peut-être déjà là, inclus dans votre abonnement Oracle Linux... https://t.co/RPZw37yOvs pic.twitter.com/aQZInFcUsv
— Ludovico Caldara (@ludodba) 6 septembre 2021
J'avais cru comprendre que l'accès à celui-ci nécessitait un accès ULN, il n'y avait donc aucun moyen de lancer une machine virtuelle rapide à la maison et de l'essayer... mais j'avais tort.
Comme l'a confirmé Ludovico, il y a un accès public :
J'ai peut-être parlé trop tôt, il semble qu'un dépôt public soit également disponible :https://t.co/XxZhs9oFDi
— Ludovico Caldara (@ludodba) 7 septembre 2021
J'ai pensé que je vais rester simple pour l'instant, alors je viens de créer une machine virtuelle avec Vagrant et je confirme que vous pouvez la tester depuis chez vous à partir de ce référentiel public.
Tout d'abord, ajoutez et activez le référentiel public Automation sur votre système :
[root@OracleAuto ~]# dnf config-manager --add-repo http://yum.oracle.com/repo/OracleLinux/OL8/automation/x86_64
Adding repo from: http://yum.oracle.com/repo/OracleLinux/OL8/automation/x86_64


[root@OracleAuto ~]#  dnf repolist
repo id                                                       repo name
ol8_UEKR6                                                     Latest Unbreakable Enterprise Kernel Release 6 for Oracle Linux 8 (x86_64)
ol8_appstream                                                 Oracle Linux 8 Application Stream (x86_64)
ol8_baseos_latest                                             Oracle Linux 8 BaseOS Latest (x86_64)
yum.oracle.com_repo_OracleLinux_OL8_automation_x86_64         created by dnf config-manager from http://yum.oracle.com/repo/OracleLinux/OL8/automation/x86_64
[root@OracleAuto ~]# dnf config-manager --set-enabled yum.oracle.com_repo_OracleLinux_OL8_automation_x86_64


[root@OracleAuto ~]# dnf update
created by dnf config-manager from http://yum.oracle.com/repo/OracleLinux/OL8/automation/x86_64                                      108 kB/s | 437 kB     00:04
Last metadata expiration check: 0:00:01 ago on Tue 07 Sep 2021 07:35:18 PM UTC.
Dependencies resolved.
=====================================================================================================================================================================
 Package                                     Architecture            Version                                                Repository                          Size
=====================================================================================================================================================================
Installing:
 kernel-uek                                  x86_64                  5.4.17-2102.204.4.4.el8uek                             ol8_UEKR6                           66 M
Upgrading:
 NetworkManager                              x86_64                  1:1.30.0-10.0.1.el8_4                                  ol8_baseos_latest                  2.6 M
 NetworkManager-libnm                        x86_64                  1:1.30.0-10.0.1.el8_4                                  ol8_baseos_latest                  1.8 M
 btrfs-progs                                 x86_64                  5.12.1-1.el8                                           ol8_UEKR6                          858 k
 dhcp-client                                 x86_64                  12:4.3.6-44.el8_4.1                                    ol8_baseos_latest                  318 k
 dhcp-common                                 noarch                  12:4.3.6-44.el8_4.1                                    ol8_baseos_latest                  207 k
 dhcp-libs                                   x86_64                  12:4.3.6-44.el8_4.1                                    ol8_baseos_latest                  148 k
 dmidecode                                   x86_64                  1:3.2-8.0.2.el8                                        ol8_baseos_latest                   92 k
[....]
  nvme-cli-1.12-4.el8_4.x86_64                               openldap-2.4.46-17.el8_4.x86_64                        oraclelinux-release-el8-1.0-19.el8.x86_64
  procps-ng-3.3.15-6.0.1.el8.x86_64                          python3-firewall-0.8.2-7.0.1.el8_4.noarch              python3-rpm-4.14.3-14.el8_4.x86_64
  rpm-4.14.3-14.el8_4.x86_64                                 rpm-build-libs-4.14.3-14.el8_4.x86_64                  rpm-libs-4.14.3-14.el8_4.x86_64
  rpm-plugin-selinux-4.14.3-14.el8_4.x86_64                  rpm-plugin-systemd-inhibit-4.14.3-14.el8_4.x86_64      rsyslog-8.1911.0-7.0.1.el8_4.2.x86_64
  selinux-policy-3.14.3-67.0.6.el8_4.1.noarch                selinux-policy-targeted-3.14.3-67.0.6.el8_4.1.noarch   systemd-239-45.0.2.el8_4.3.x86_64
  systemd-libs-239-45.0.2.el8_4.3.x86_64                     systemd-pam-239-45.0.2.el8_4.3.x86_64                  systemd-udev-239-45.0.2.el8_4.3.x86_64
  virt-what-1.18-9.el8_4.x86_64
Installed:
  kernel-uek-5.4.17-2102.204.4.4.el8uek.x86_64

Complete!
[root@OracleAuto ~]#
Après avoir mis à jour le système, nous pouvons rechercher le package du gestionnaire d'automatisation
[root@OracleAuto ~]# dnf search automation-manager
Last metadata expiration check: 0:07:57 ago on Tue 07 Sep 2021 07:35:18 PM UTC.
================================================================= Name Matched: automation-manager ==================================================================
ol-automation-manager.src : Oracle Linux Automation Manager, based on AWX, provides a web-based user interface, REST API, and task engine built on top of Ansible.
ol-automation-manager.x86_64 : Oracle Linux Automation Manager, based on AWX, provides a web-based user interface, REST API, and task engine built on top of Ansible.
oraclelinux-automation-manager-release-el8.src : Oracle Linux Automation Manager yum repository configuration
oraclelinux-automation-manager-release-el8.x86_64 : Oracle Linux Automation Manager yum repository configuration
[root@OracleAuto ~]#
L'installation du package d'automatisation est assez simple (pour une configuration par défaut/test, bien sûr) et vous pouvez voir un exemple ci-dessous copié de la documentation Oracle :
Installation d'Oracle Linux Automation Manager
[root@OracleAuto ~]# dnf install ol-automation-manager
Last metadata expiration check: 0:09:39 ago on Tue 07 Sep 2021 07:35:18 PM UTC.
Dependencies resolved.
=====================================================================================================================================================================
 Package                            Architecture Version                                           Repository                                                   Size
=====================================================================================================================================================================
Installing:
 ol-automation-manager              x86_64       1.0.0-1.el8                                       yum.oracle.com_repo_OracleLinux_OL8_automation_x86_64        67 M
Installing dependencies:
 aajohan-comfortaa-fonts            noarch       3.001-2.el8                                       ol8_baseos_latest                                           148 k
 ansible                            noarch       2.9.23-1.el8                                      yum.oracle.com_repo_OracleLinux_OL8_automation_x86_64        17 M
 bzip2                              x86_64       1.0.6-26.el8                                      ol8_baseos_latest                                            60 k
 checkpolicy                        x86_64       2.9-1.el8                                         ol8_baseos_latest                                           346 k
 emacs-filesystem                   noarch       1:26.1-5.el8                                      ol8_baseos_latest                                            69 k
 fontconfig                         x86_64       2.13.1-3.el8                                      ol8_baseos_latest                                           274 k
 fontpackages-filesystem            noarch       1.44-22.el8                                       ol8_baseos_latest                                            16 k
 gd                                 x86_64       2.2.5-7.el8                                       ol8_appstream                                               144 k
[...]

  redis-5.0.3-2.module+el8.0.0.z+5250+19ca22c8.x86_64                                   sos-4.0-11.0.1.el8.noarch
  sshpass-1.06-9.el8.x86_64                                                             supervisor-4.2.2-1.el8.noarch
  uwsgi-2.0.18-4.0.1.el8.x86_64                                                         xmlsec1-1.2.25-4.el8.x86_64
  xmlsec1-openssl-1.2.25-4.el8.x86_64

Complete!
[root@OracleAuto ~]#
Ensuite, nous devons configurer la configuration à l'aide de l'utilisateur AWX.
Encore une fois, en suivant simplement l'exemple de la documentation :
[root@OracleAuto ~]# cat /etc/redis.conf
[...]
unixsocket /var/run/redis/redis.sock
unixsocketperm 775

[root@OracleAuto ~]# /var/lib/ol-automation-manager/ol-automation-manager-DB-init.sh
 * Initializing database in '/var/lib/pgsql/data'
 * Initialized, logs are in /var/lib/pgsql/initdb_postgresql.log
Database pre-setup is completed
[root@OracleAuto ~]#

[root@OracleAuto ~]# su -l awx -s /bin/bash


[awx@OracleAuto ~]$ awx-manage migrate
Operations to perform:
  Apply all migrations: auth, conf, contenttypes, main, oauth2_provider, sessions, sites, social_django, sso, taggit
Running migrations:
  Applying contenttypes.0001_initial... OK
  Applying contenttypes.0002_remove_content_type_name... OK
  Applying taggit.0001_initial... OK
  Applying taggit.0002_auto_20150616_2121... OK
  Applying auth.0001_initial... OK
  Applying main.0001_initial... OK
  Applying main.0002_squashed_v300_release... OK
  Applying main.0003_squashed_v300_v303_updates... OK
  Applying main.0004_squashed_v310_release... OK
  Applying conf.0001_initial... OK
  Applying conf.0002_v310_copy_tower_settings... OK
  Applying main.0005_squashed_v310_v313_updates... OK
  Applying main.0006_v320_release... OK
  Applying main.0007_v320_data_migrations... OK
  Applying main.0008_v320_drop_v1_credential_fields... OK
  Applying main.0009_v322_add_setting_field_for_activity_stream... OK
[....]

  Applying social_django.0002_add_related_name... OK
  Applying social_django.0003_alter_email_max_length... OK
  Applying social_django.0004_auto_20160423_0400... OK
  Applying social_django.0005_auto_20160727_2333... OK
  Applying social_django.0006_partial... OK
  Applying social_django.0007_code_timestamp... OK
  Applying social_django.0008_partial_timestamp... OK
  Applying sso.0001_initial... OK
  Applying sso.0002_expand_provider_options... OK
  Applying taggit.0003_taggeditem_add_unique_index... OK
Créons maintenant l'utilisateur de gestion et assurons-nous de définir le nom d'hôte/l'adresse IP corrects pour la "provision d'instance AWX"
[awx@OracleAuto ~]$ awx-manage createsuperuser --username admin
Email address: [email protected]
Password:
Password (again):
Superuser created successfully.
[awx@OracleAuto ~]$


[awx@OracleAuto ~]$ awx-manage create_preload_data
Default organization added.
Demo Credential, Inventory, and Job Template added.
(changed: True)
[awx@OracleAuto ~]$ awx-manage provision_instance --hostname=OracleAuto
Successfully registered instance OracleAuto
(changed: True)
[awx@OracleAuto ~]$ awx-manage register_queue --queuename=tower --hostnames=OracleAuto
Creating instance group tower
Added instance OracleAuto to tower
(changed: True)
[awx@OracleAuto ~]$
[awx@OracleAuto ~]$ exit
logout
Une fois cela terminé, nous devons configurer le serveur HTTP.
Puisqu'il ne s'agit que d'un test, vous pouvez simplement créer un certificat ssl pour éviter les problèmes de connexion à votre interface de gestion (veuillez ne pas le faire sur votre système de production :) )
[root@OracleAuto ~]# openssl req -x509 -nodes -days 365 -newkey rsa:2048 -keyout /etc/tower/tower.key -out /etc/tower/tower.crt
Generating a RSA private key
......+++++
.+++++
writing new private key to '/etc/tower/tower.key'
-----
You are about to be asked to enter information that will be incorporated
into your certificate request.
What you are about to enter is what is called a Distinguished Name or a DN.
There are quite a few fields but you can leave some blank
For some fields there will be a default value,
If you enter '.', the field will be left blank.
-----
Country Name (2 letter code) [XX]:
State or Province Name (full name) []:
Locality Name (eg, city) [Default City]:
Organization Name (eg, company) [Default Company Ltd]:
Organizational Unit Name (eg, section) []:
Common Name (eg, your name or your server's hostname) []:
Email Address []:
[root@OracleAuto ~]#
Je suis sûr que vous pouvez changer le serveur Web en votre préféré, mais pour l'instant, nous allons configurer le serveur nginx qui est celui par défaut.
Ici, nous venons de faire une sauvegarde de la configuration par défaut et de copier la configuration par défaut de la documentation :
[root@OracleAuto ~]# mv /etc/nginx/nginx.conf /etc/nginx/nginx.conf.bk
[root@OracleAuto ~]# nano /etc/nginx/nginx.conf

[root@OracleAuto ~]# cat /etc/nginx/nginx.conf
user nginx;
worker_processes auto;
error_log /var/log/nginx/error.log;
pid /run/nginx.pid;

# Load dynamic modules. See /usr/share/doc/nginx/README.dynamic.
include /usr/share/nginx/modules/*.conf;

events {
    worker_connections 1024;
}

http {
    log_format  main  '$remote_addr - $remote_user [$time_local] "$request" '
                      '$status $body_bytes_sent "$http_referer" '
                      '"$http_user_agent" "$http_x_forwarded_for"';

    access_log  /var/log/nginx/access.log  main;

    sendfile            on;
    tcp_nopush          on;
    tcp_nodelay         on;
    keepalive_timeout   65;
    types_hash_max_size 2048;

    include             /etc/nginx/mime.types;
    default_type        application/octet-stream;

    # Load modular configuration files from the /etc/nginx/conf.d directory.
    # See http://nginx.org/en/docs/ngx_core_module.html#include
    # for more information.
    include /etc/nginx/conf.d/*.conf;
}
[root@OracleAuto ~]#
Dernières étapes, modifiez simplement quelques informations sur le fichier de configuration de la tour (ajoutez simplement votre nom d'hôte/IP dans CLUSTER_HOST_ID) et activez/démarrez le service Oracle Automation Manager avec Systemd
[root@OracleAuto ~]# grep -i CLUSTER_HOST_ID /etc/tower/settings.py
CLUSTER_HOST_ID = "OracleAuto"
[root@OracleAuto ~]#

[root@OracleAuto ~]# systemctl enable --now ol-automation-manager.service
Created symlink /etc/systemd/system/multi-user.target.wants/ol-automation-manager.service → /usr/lib/systemd/system/ol-automation-manager.service.
[root@OracleAuto ~]#
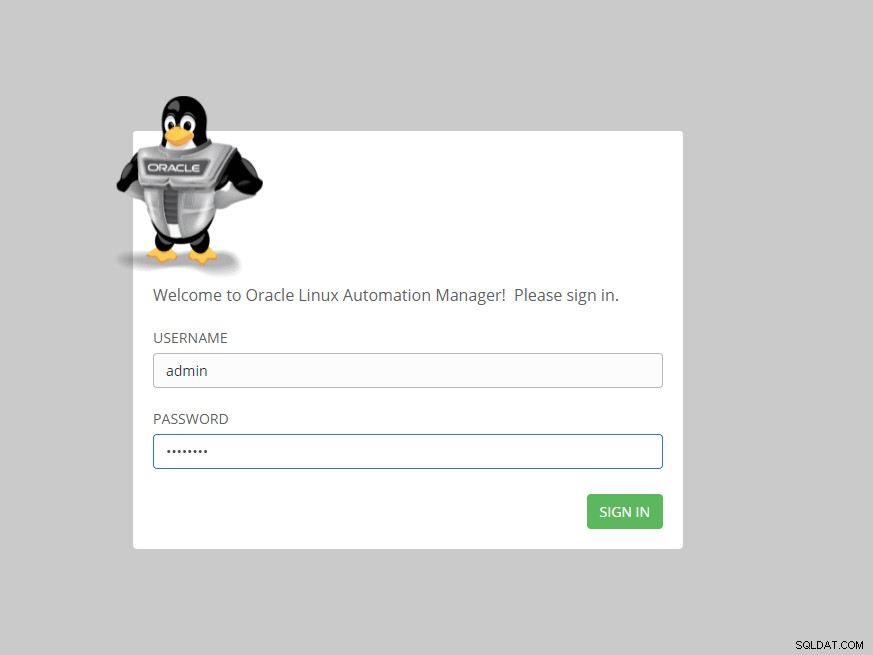
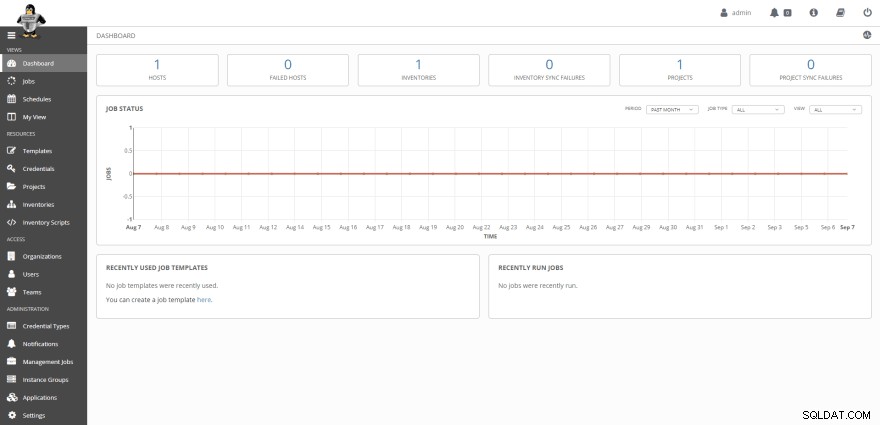
Et voilà ! vous pouvez maintenant commencer à gérer vos playbooks ansibles directement depuis l'interface Oracle Automation Manager


J'ai vraiment besoin d'en savoir plus sur Ansible et l'automatisation, donc cela pourrait être un bon moyen de commencer à utiliser le propre gestionnaire d'automatisation d'Oracle :)


