La première étape consiste à utiliser get cli pour générer la structure de base du projet
https://pub.dev/packages/get_cli
get create project:strapi_flutter_internation_poc
  1) Flutter Project
  2) Get Server
1
? What is your company's domain?  Example: com.yourcompany  com.nasawz.strapi_flutter_internation_poc

what language do you want to use on ios?

  1) Swift
  2) Objective-C
1

what language do you want to use on android?

  1) Kotlin
  2) Java
1

Do you want to use null safe?

  1) Yes!
  2) No
1

do you want to use some linter?

  1) no
  2) Pedantic [Deprecated]
  3) Effective Dart [Deprecated]
  4) Dart Recommended
1

Running `flutter create D:\poc\strapi_flutter_internation_poc` …

$ flutter create --no-pub -i swift -a kotlin --org com.nasawz.strapi_flutter_internation_poc D:\poc\strapi_flutter_internation_poc
Creating project ....
  lib\main.dart (created)
  pubspec.yaml (created)
  README.md (created)
  test\widget_test.dart (created)
  .gitignore (created)
  .idea\libraries\Dart_SDK.xml (created)
  .idea\libraries\KotlinJavaRuntime.xml (created)
  .idea\modules.xml (created)
  .idea\runConfigurations\main_dart.xml (created)
  .idea\workspace.xml (created)
  .metadata (created)
 .......
 ........
Wrote 81 files.

All done!
In order to run your application, type:

  $ cd .
  $ flutter run

Your application code is in .\lib\main.dart.


Running `flutter pub get` …

$ flutter pub get
Running "flutter pub get" in strapi_flutter_internation_poc...      2,666ms
$ dart migrate --apply-changes --skip-import-check
Migrating D:\poc\strapi_flutter_internation_poc

See https://dart.dev/go/null-safety-migration for a migration guide.

Analyzing project...
All sources appear to be already migrated.  Nothing to do.
✓  File: analysis_options.yaml created successfully at path: analysis_options.yaml
  1) GetX Pattern (by Kauê)
  2) CLEAN (by Arktekko)
1

Your lib folder is not empty. Are you sure you want to overwrite your application?
 WARNING: This action is irreversible

  1) Yes!
  2) No
1
✓  'Package: get installed!
✓  File: main.dart created successfully at path: lib\\main.dart
✓  File: home_controller.dart created successfully at path: ./lib\app\modules\home\\controllers\\home_controller.dart
✓  File: home_view.dart created successfully at path: ./lib\app\modules\home\\views\\home_view.dart
✓  File: home_binding.dart created successfully at path: ./lib\app\modules\home\\bindings\\home_binding.dart
✓  File: app_routes.dart created successfully at path: lib\\app\\routes\\app_routes.dart
✓  File: app_pages.dart created successfully at path: lib\\app\\routes\\app_pages.dart
✓  home route created successfully.
✓  Home page created successfully.
✓  GetX Pattern structure successfully generated.

Running `flutter pub get` …

$ flutter pub get
Running "flutter pub get" in strapi_flutter_internation_poc...
Jusqu'à présent, nous avons une structure de projet basée sur Flutter.
Ensuite, incorporons Strapi dans le projet.
Deuxième étape, intégrer dans Strapi
https://strapi.io/
Entrer dans le répertoire du projet
cd .\strapi_flutter_internation_poc
Utilisez "create-strapi-app" pour initialiser le projet
npx create-strapi-app strapi
npx: installed 146 in 14.856s
? Choose your installation type Quickstart (recommended)
? Would you like to use a template? (Templates are Strapi configurations designed for a specific use case) No
Creating a quickstart project.
Creating a new Strapi application at D:\poc\strapi_flutter_internation_poc\strapi.
Creating files.
Dependencies installed successfully.

Your application was created at D:\poc\strapi_flutter_internation_poc\strapi.

Available commands in your project:

  yarn develop
  Start Strapi in watch mode.

  yarn start
  Start Strapi without watch mode.

  yarn build
  Build Strapi admin panel.

  yarn strapi
  Display all available commands.

You can start by doing:

  cd D:\poc\strapi_flutter_internation_poc\strapi
  yarn develop


> strapi@0.1.0 build D:\poc\strapi_flutter_internation_poc\strapi
> strapi build "--no-optimization"

Building your admin UI with development configuration ...

√ Webpack
  Compiled successfully in 27.43s

Running your Strapi application.
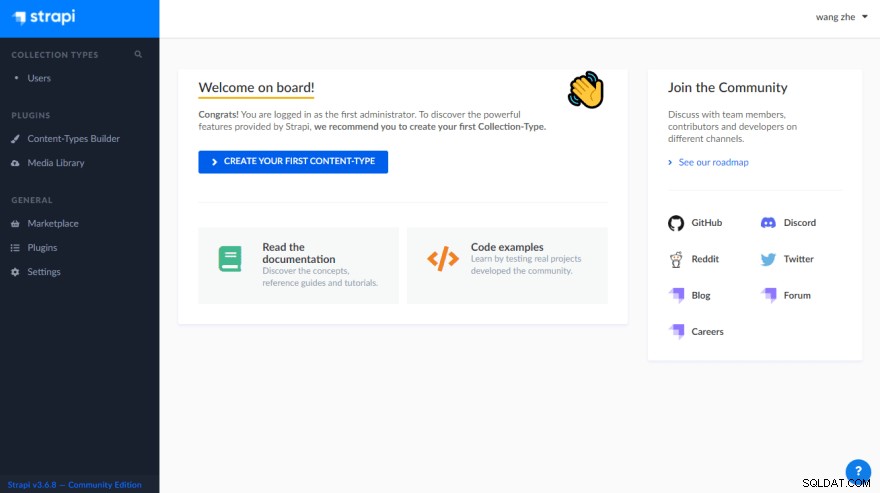
Ici, Strapi est installé avec succès et démarré localement https://localhost:1337

Après avoir vu cette interface, vous pouvez d'abord la mettre en pause et modifier d'abord la configuration de Strapi. Pointez l'adresse de la base de données Sqlite par défaut dans Strapi vers le dossier assets du projet Flutter.
Créez d'abord le dossier assets/db correspondant
modifier [project_root]/strapi/config/database.js
module.exports = ({ env }) => ({
  defaultConnection: 'default',
  connections: {
    default: {
      connector: 'bookshelf',
      settings: {
        client: 'sqlite',
        filename: env('DATABASE_FILENAME', '../assets/db/data.db'),
      },
      options: {
        useNullAsDefault: true,
      },
    },
  },
});
Redémarrez le projet Strapi une fois la modification terminée
npm run develop
Enregistrer un compte administrateur
admin@poc.com
nrVABVAAYq9geTY

Modifier le fichier de configuration pubspec.yaml du projet Flutter et mettre le chemin de la base de données sous assets
flutter:
  assets:
    - assets/db/
  uses-material-design: true
Dans les développements ultérieurs, Flutter peut utiliser les fichiers de base de données de Strapi.
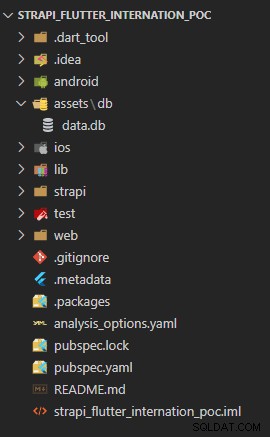
Voyez maintenant la structure du projet comme indiqué ci-dessous


