1 Introduction au didacticiel MS Access 2010, 2013, 2016 et 2019
Bienvenue dans le didacticiel MS Access. Ce didacticiel est conçu pour permettre à l'utilisateur d'être rapidement opérationnel avec MS Access (désormais simplement "Access"). Les quatre modules de base d'Access sont présentés :tableaux, formulaires, rapports et requêtes. Un exemple d'entreprise est d'abord discuté, qui fournit un arrière-plan pour le développement d'une base de données simple.
Il est supposé que les utilisateurs de ce didacticiel sont compétents pour travailler avec Microsoft Windows XP/Vista/Win7/Win10, etc. et avec MS Excel. Cela inclut l'utilisation du clavier et de la souris. Le didacticiel est basé sur Microsoft Access, qui fait partie de la suite Microsoft Office Professional qui comprend également MS Excel, MS Word et MS Powerpoint.
Ce tutoriel couvre MS Access 2007, 2010, 2013, 2016 et 2019 qui ont une interface commune (la "barre de ruban" en haut) qui est différente des versions précédentes. Si vous souhaitez travailler avec MS Access '97 ou 2000, veuillez visiter la page Web Microsoft Access Tutorial - Covering MS Access '97 and 2000.
Le didacticiel commence par un bref aperçu des bases de données relationnelles . La majorité des systèmes de gestion de bases de données utilisés aujourd'hui sont basés sur ce qu'on appelle le modèle de base de données relationnelle. Access est un système de gestion de bases de données relationnelles. Nous décrivons ensuite un exemple métier et donnons un aperçu de la base de données et des applications que nous souhaitons développer. Dans les sections qui suivent, nous donnons des instructions étape par étape pour créer les tableaux, les formulaires de saisie de données, les rapports et les requêtes pour l'application.
1.1 Audience visée
Ce didacticiel est destiné aux étudiants qui débutent avec le système de gestion de base de données MS Access.
1.2 Connaissances préalables
Ce didacticiel suppose que l'étudiant est familiarisé avec le fonctionnement de base d'un ordinateur personnel et de Windows 2000, Windows XP, Windows Vista ou Windows 7. Les compétences spécifiques requises pour ce didacticiel sont :
- Utilisation de la souris et du clavier
- Ouvrir et enregistrer des fichiers sur le disque dur et sur une clé USB (clé USB) par exemple
- Gestion des fichiers en général, y compris la différence entre les lettres de lecteur, le disque dur, etc.
- Exécuter des programmes à partir du menu Démarrer de Windows
- Réduire, maximiser et redimensionner les fenêtres
L'étudiant doit disposer d'une clé USB (clé USB) ou d'un autre périphérique de mémoire portable pour stocker les fichiers qui seront créés au cours de ce didacticiel.
1.3 Exécution de Microsoft Access sur un Mac Apple
Un problème auquel certains étudiants peuvent être confrontés est le fait que MS Access ne fonctionne que sous le système d'exploitation Windows (tel que Windows XP, Vista ou Windows 7). Si vous avez un MacBook, un iMac ou un autre système Apple exécutant MacOS qui utilise un processeur Intel, vous pouvez essayer quelques alternatives possibles. De nombreux ordinateurs Apple modernes qui utilisent un processeur Intel peuvent exécuter le système d'exploitation Windows. Notez que vous aurez besoin d'une copie sous licence légale du système d'exploitation Windows pour ce faire. Il existe deux manières principales d'y parvenir :
- Vous pouvez configurer votre Mac sur "Dual Boot" à la fois MacOS X et Windows. Un produit qui peut permettre cela est le logiciel Apple BootCamp.
- Vous pouvez exécuter le système d'exploitation Windows "côte à côte" avec Mac OS X à l'aide d'un ordinateur "virtuel" tel que VirtualBox
Table des matières
- 1 Introduction au didacticiel MS Access
- 1.1 Audience visée
- 1.2 Connaissances préalables
- 1.3 Exécution de Microsoft Access sur un Mac Apple
- 2 Bref aperçu des bases de données relationnelles et des applications de bases de données
- 3 Exemple commercial
- 4 Démarrage de Microsoft Access
- 4.1 Examen du démarrage de Microsoft Access
- 5 Créer et afficher des tableaux
- 5.1 Création d'un tableau à l'aide de la vue de conception
- Exercice 5.2 :Créer un tableau
- 5.3 Afficher et ajouter des données à un tableau
- Exercice 5.4 :Ajouter des données à un tableau
- 5.5 Créer des relations entre les tables
- 5.6 Examen de la création et de l'affichage des tableaux
- 6 Création et exécution de requêtes
- 6.1 Requêtes sur une seule table
- 6.2 Exercice :Requêtes sur une seule table
- 6.3 Requêtes sur plusieurs tables
- Exercice 6.4 :Requêtes sur plusieurs tables
- 6.5 Examen de la création et de l'exécution de requêtes
- 7 Création et exécution de formulaires de saisie de données
- 7.1 Création d'un formulaire de table unique à l'aide de l'assistant
- 7.2 Exercice :Créer un formulaire de table unique
- 7.3 Examen de la création et de l'exécution d'un formulaire de saisie de données
- 8 Création et exécution de rapports
- 8.1 Création d'un rapport de tableau unique à l'aide de l'assistant
- 8.2 Exercice :Créer un rapport de tableau unique
- 8.3 Examen de la création et de l'exécution d'un rapport
- 9 Création et exécution d'un formulaire principal/détail (formulaire avec un sous-formulaire)
- 10 Création et exécution d'un menu général
- 11 Création et exécution d'un formulaire de navigation
- 11.1 Exercice :Modifier un formulaire de navigation
- 11.2 Définir le formulaire de navigation par défaut
- 12 résumé du didacticiel et sujets avancés
La page suivante donne une brève introduction aux bases de données relationnelles.
2 Bref aperçu des bases de données relationnelles et des applications de bases de données
Les premières bases de données mises en œuvre dans les années 1960 et 1970 étaient basées soit sur des fichiers de données plats, soit sur des modèles de données hiérarchiques ou en réseau. Ces méthodes de stockage des données étaient relativement rigides en raison de leur structure rigide et de leur forte dépendance aux programmes d'application pour effectuer même les traitements les plus courants.
À la fin des années 1970, le modèle de base de données relationnelle qui est né dans la communauté de la recherche universitaire est devenu disponible dans des implémentations commerciales telles qu'IBM DB2 et Oracle. Le modèle de données relationnelles spécifie les données stockées dans des relations qui ont des relations parmi eux (d'où le nom relationnel ).
Dans les bases de données relationnelles telles que Sybase, MySQL, Oracle, IBM DB2, MS SQL Server et MS Access, les données sont stockées dans des tables composé d'une ou plusieurs colonnes (Access appelle une colonne un champ ). Les données stockées dans chaque colonne doivent être d'un seul type de données tels que Caractère (parfois appelé "chaîne"), Nombre ou Date. Une collection de valeurs de chaque colonne d'une table est appelée un enregistrement ou une ligne dans le tableau.
Différentes tables peuvent avoir la même colonne en commun. Cette fonctionnalité est utilisée pour spécifier explicitement une relation entre deux tables. Les valeurs apparaissant dans la colonne A d'une table sont partagées avec une autre table.
Voici deux exemples de tables dans une base de données relationnelle pour une banque locale :
Tableau des clients
| ID client | Prénom | Nom de famille | Adresse municipale | Ville | État | Zip |
|---|---|---|---|---|---|---|
| Numéro | Personnage | Personnage | Personnage | Personnage | Personnage | Personnage |
| 1001 | Joseph | Smith | 123 Lexington | Smithville | KY | 91232 |
| 1002 | Alberta | Jones | 12, avenue Davis | Smithville | KY | 91232 |
| 1003 | Nathanial | Hache | 443 Grinder Ln. | Broadville | AG | 81992 |
| 1004 | Pauline | Constructeur | 661, chemin Parker | Streetville | AG | 81990 |
Tableau des comptes
| ID client | Numéro de compte | Type de compte | Date d'ouverture | Solde |
|---|---|---|---|---|
| Numéro | Numéro | Personnage | Date | Numéro |
| 1001 | 9987 | Vérification | 10/12/1989 | 4000.00 |
| 1001 | 9980 | Économies | 10/12/1989 | 2000.00 |
| 1002 | 8811 | Économies | 01/05/1992 | 1000.00 |
| 1003 | 4422 | Vérification | 01/12/1994 | 6000.00 |
| 1003 | 4433 | Économies | 01/12/1994 | 9000.00 |
| 1004 | 3322 | Économies | 22/08/1994 | 500.00 |
| 1004 | 1122 | Vérification | 13/11/1988 | 800.00 |
La table Customer comporte 7 colonnes (CustomerID, First Name, Last Name, Street Address, City, State et Zip) et 4 lignes (ou enregistrements) de données. La table Accounts comporte 5 colonnes (CustomerID, AccountNumber, AccountType, DateOpened et Balance) avec 7 lignes de données.
Chacune des colonnes est conforme à l'un des trois types de données de base :Caractère, Nombre ou Date. Le type de données d'une colonne indique le type de valeurs de données pouvant être stockées dans cette colonne.
- Nombre - ne peut stocker que des nombres, éventuellement avec un point décimal. Peut être positif ou négatif.
- Caractère - peut stocker des chiffres, des lettres et des signes de ponctuation. Access appelle ce type de données Texte .
- Date :ne peut stocker que des données de date et d'heure.
Dans certaines implémentations de bases de données, d'autres types de données existent, tels que les images (pour les images ou d'autres données). Cependant, les trois types de données ci-dessus sont les plus couramment utilisés.
Notez que les deux tables partagent la colonne CustomerID et que les valeurs de la colonne CustomerID de la table Customer sont identiques aux valeurs de la colonne CustomerID de la table Accounts. Cette relation nous permet de préciser que le Client Nathanial Axe possède à la fois un compte courant et un compte d'épargne qui ont tous deux été ouverts le même jour :le 1er décembre 1994.
Un autre nom donné à une telle relation est Maître/Détail . Dans une relation maître/détail, un seul enregistrement maître (tel que Client 1003, Nathanial Axe) peut être associé à plusieurs enregistrements de détail (les deux comptes).
Dans une relation maître/détail, il est possible qu'un enregistrement maître existe sans aucun détail. Cependant, il est impossible d'avoir un enregistrement de détail sans un enregistrement principal correspondant. Par exemple, un client peut ne pas nécessairement avoir d'informations sur le compte. Cependant, toute information de compte doit être associé à un seul Client.
Chaque table doit également avoir une colonne spéciale appelée Clé qui est utilisé pour identifier de manière unique les lignes ou les enregistrements dans la table. Les valeurs d'une ou de plusieurs colonnes clés ne peuvent jamais être dupliquées. Dans les tableaux ci-dessus, CustomerID est la clé de la table Customer tandis que AccountNumber est la clé de la table Accounts.
3 Un exemple commercial
Dans cette section, nous présenterons un exemple métier qui servira de base aux exemples tout au long du didacticiel. Dans les organisations, le travail d'analyse de l'activité et de détermination de la structure de base de données appropriée (tables et colonnes) est généralement effectué par des analystes système . Un analyste de systèmes rassemblera des informations sur le fonctionnement de l'entreprise et formera un modèle des exigences de stockage des données. À partir de ce modèle, un programmeur de base de données créera les tables de la base de données, puis travaillera avec les développeurs d'applications pour développer le reste de l'application de base de données.
Pour ce tutoriel, nous allons considérer une simple entreprise bancaire. La banque compte de nombreux clients qui ouvrent et gèrent un ou plusieurs comptes. Pour chaque Client, nous gardons une trace de son nom et de son adresse. Nous leur attribuons également un CustomerID unique. Nous attribuons cet identifiant unique à la fois pour plus de commodité et pour plus de précision. Il est beaucoup plus facile d'identifier un seul client à l'aide de son CustomerID plutôt qu'en recherchant son nom complet et son adresse. De plus, il est possible que la banque ait deux clients portant le même nom (par exemple, Bill Smith). Dans de tels cas, le CustomerID unique peut toujours être utilisé pour les différencier.
De la même manière, tous les comptes se voient attribuer un numéro de compte unique. Un compte peut être soit un compte courant, soit un compte d'épargne. Les comptes d'épargne rapportent des intérêts, mais les seules transactions autorisées sont les dépôts et les retraits. Les comptes courants ne rapportent pas d'intérêts. Nous maintenons la date à laquelle le compte a été ouvert. Cela nous aide à suivre nos clients et peut être utile à des fins de marketing. Enfin, nous maintenons le solde actuel d'un compte.
Dans la section précédente, nous avons donné la structure et quelques exemples de données pour la table Customer et la table Accounts. Ceux-ci seront utilisés pour prendre en charge la partie stockage des données de notre application bancaire.
Applications de base de données
Dans toute application de base de données, chacune des tables nécessite un moyen d'y insérer des données et de récupérer et de modifier les données ultérieurement. Le principal moyen d'obtenir des données dans des tableaux consiste à utiliser des formulaires de saisie de données. Les principaux moyens de récupérer des données à partir de tables ou d'afficher des données dans des tables consistent à utiliser des requêtes ou des rapports. Dans une application de base de données complète, tous les formulaires et rapports sont liés dans un formulaire de navigation - une seule page qui contiendra des liens vers chacune des parties de l'application. Une grande application de base de données peut avoir des dizaines de formulaires et de rapports de saisie de données.
Pour ce tutoriel, nous allons créer un formulaire de saisie de données pour chaque table, une requête pour chaque table et un rapport pour chaque table.
Dans les sections suivantes, nous allons d'abord vous présenter comment démarrer Access et comment créer une nouvelle base de données.
4 Démarrage de Microsoft Access
Comme avec la plupart des programmes Windows, Access peut être exécuté en naviguant dans le menu Démarrer dans le coin inférieur gauche du bureau Windows.
Pour démarrer Access, cliquez sur le bouton Démarrer, puis sur le menu Programmes, puis passez au menu Microsoft Office et enfin cliquez sur l'élément de menu Microsoft Access. Le menu MS Office Professionnel est illustré ci-dessous.
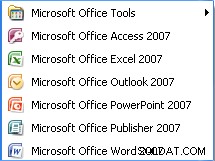
Notez que cette disposition des menus peut varier en fonction de la manière dont MS Office a été installé sur le PC que vous utilisez.
Une fois Access lancé, un écran initial s'affichera :
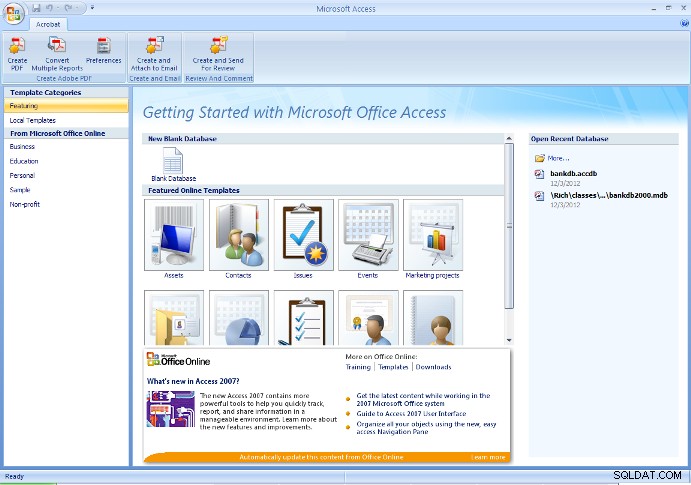
À partir de cet écran initial, l'utilisateur peut créer une nouvelle base de données (soit vide, soit avec des tables créées avec l'assistant de base de données), ou ouvrir une base de données existante.
En général, la première fois que l'on commence un projet, une nouvelle base de données vierge doit être créée. Après ce point, utilisez le Ouvrir la base de données existante possibilité de rouvrir la base de données créée précédemment.
Avertissement – Si vous avez déjà créé une base de données, puis que vous la créez à nouveau en utilisant le même nom, vous écraserez tout travail que vous avez effectué.
Pour les besoins de ce didacticiel, si vous suivez ces étapes pour la première fois, choisissez l'option permettant de créer une nouvelle base de données vierge, comme indiqué dans la figure ci-dessus.
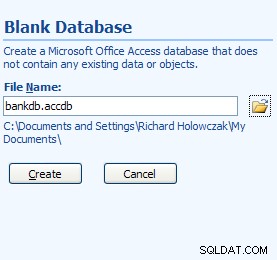
Dans Access 2007, cliquez sur le bouton rond Office dans le coin supérieur gauche et choisissez Nouveau dans le menu déroulant. Remplissez Nom du fichier comme bankdb.accdb et cliquez sur le bouton Créer pour créer la base de données comme dans la figure ci-dessous.
Nouvel écran de base de données pour Access 2007
Dans le nom de fichier ci-dessus, bankdb est le nom choisi pour cette base de données particulière et .accdb est l'extension de nom de fichier donnée pour Microsoft DataBase 2007, Fichiers 2010 et 2013.
Il est conseillé de garder le nom de la base de données (bankdb dans l'exemple ci-dessus) relativement court et de ne pas utiliser d'espaces ou d'autres signes de ponctuation dans le nom de la base de données. De plus, le nom de la base de données doit refléter le contenu de la base de données.
Une fois la nouvelle base de données créée, l'écran d'accès principal suivant apparaît :
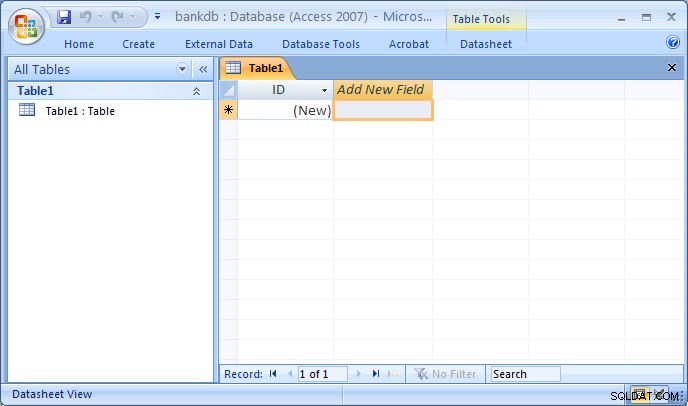
La disposition de l'écran pour MS Access 2007 est très différente des versions précédentes. La plupart des onglets en haut de l'écran ont été réorganisés. De plus, l'écran principal par défaut après la création d'une nouvelle base de données passe automatiquement en mode Conception pour créer une nouvelle table.
Les onglets suivants apparaîtront en haut de l'écran :
- Onglet Accueil – Contrôles pour changer les polices, effectuer des requêtes, copier/coller/couper des données, etc.
- Créer un onglet – Contrôles pour créer des tableaux, des formulaires, des rapports, etc.
- Onglet Données externes – Contrôles pour le chargement de données provenant d'autres sources de données dans MS Access.
- Onglet Outils de base de données – Contrôles de gestion des bases de données (sécurité, standard, etc.)
- Onglet Conception – Cela apparaîtra lors de la conception d'un nouveau tableau, formulaire, rapport, etc.
Notez que les interfaces pour Access 2007, 2010 et 2013 sont toutes similaires bien que la version que vous utilisez puisse sembler légèrement différente des images incluses dans ce didacticiel.
4.1 Examen du démarrage de Microsoft Access
Pour démarrer Microsoft Access :
- Utilisez le bouton Démarrer de la barre des tâches pour ouvrir :Programmes -> MS Office -> Microsoft Access
- Pour créer une nouvelle base de données, choisissez Base de données vide et spécifiez un nouveau nom de fichier pour la base de données. Assurez-vous d'utiliser un nom descriptif pour la nouvelle base de données. Cliquez sur le bouton OK pour créer la nouvelle base de données.
- Pour ouvrir une base de données existante, choisissez Ouvrir une base de données existante , mettez en surbrillance Plus de fichiers… et cliquez sur le bouton OK. Accédez ensuite au lecteur, mettez en surbrillance le fichier de base de données existant sur le disque dur ou le lecteur USB et cliquez à nouveau sur le bouton OK pour ouvrir la base de données.
Pour quitter Access, déroulez le menu Fichier (ou le menu Office) et sélectionnez l'élément de menu Quitter.
5 Créer et afficher des tableaux
Les tables sont les principales unités de stockage de données dans Access. Rappelons qu'un tableau est composé d'une ou plusieurs colonnes (ou champs ) et qu'une colonne donnée peut apparaître dans plusieurs tables afin d'indiquer une relation entre les tables.
À partir de l'exemple commercial discuté précédemment, nous avons conclu que deux tables seraient suffisantes pour stocker les données sur les clients et leurs comptes bancaires . Nous donnons maintenant les instructions pas à pas pour créer ces deux tables dans Access.
Il existe plusieurs façons de créer une table dans Access. Access fournit des assistants qui guident l'utilisateur dans la création d'un tableau en suggérant des noms pour les tableaux et les colonnes. L'autre façon principale de créer une table est d'utiliser le Mode Création pour définir manuellement les colonnes (champs) et leurs types de données.
Bien que l'utilisation des assistants soit un moyen rapide de créer des tables, l'utilisateur a moins de contrôle sur les noms de colonne (champs) et les types de données. Dans ce tutoriel, nous décrirons les étapes pour créer une table en utilisant le Mode Création . Les élèves sont encouragés à expérimenter par eux-mêmes l'utilisation de l'assistant Créer un tableau.
5.1 Création d'une table à l'aide de la vue de conception
Pour créer une table dans Access à l'aide du mode Création, procédez comme suit :
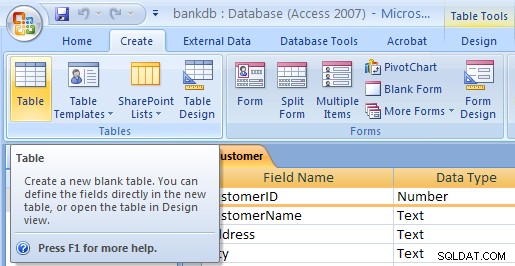
- Dans Access 2007, 2010 et 2013, l'onglet Créer une nouvelle table doit déjà être mis en surbrillance et une nouvelle table nommée table1 doit être créée. Si ce n'est pas le cas, cliquez sur Créer onglet et cliquez sur le tableau icône. Ensuite, déroulez le Affichage menu et choisissez Mode Création .

- La vue de conception de table apparaîtra. Remplissez le Nom du champ , Type de données et Description pour chaque colonne/champ du tableau. Le champ CustomerID est renseigné ci-dessous :
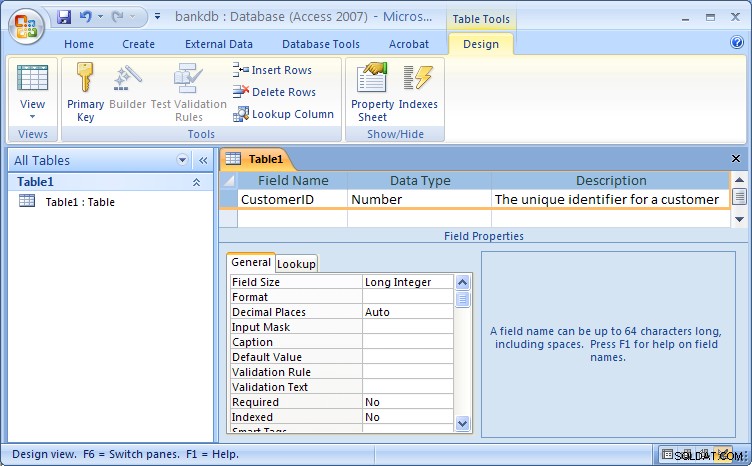
Vue de conception de table pour Access 2007Notez que le nom par défaut donné pour la table est Table1 . Dans une étape ultérieure, nous attribuerons un nom approprié à cette table.
Remplissez les informations pour les champs comme suit :
Nom du champ Type de données Description ID client Numéro L'identifiant unique d'un client Prénom Texte Le prénom du client Nom Texte Le nom de famille du client StreetAddress Texte L'adresse postale du client Ville Texte La ville du client État Texte L'État d'origine du Client Zip Texte Le code postal du client Une figure montrant la vue de conception avec la nouvelle définition de table remplie est donnée ci-dessous :

L'étape suivante consiste à définir la clé de la table et à enregistrer la table.
- Maintenant que tous les champs ont été définis pour la table, une clé primaire doit être définie. Rappelez-vous que la clé primaire sera utilisée pour identifier de manière unique un enregistrement dans la table (dans ce cas, un client). Mettez en surbrillance le ID client champ et cliquez sur le bouton Clé primaire dans la barre de boutons
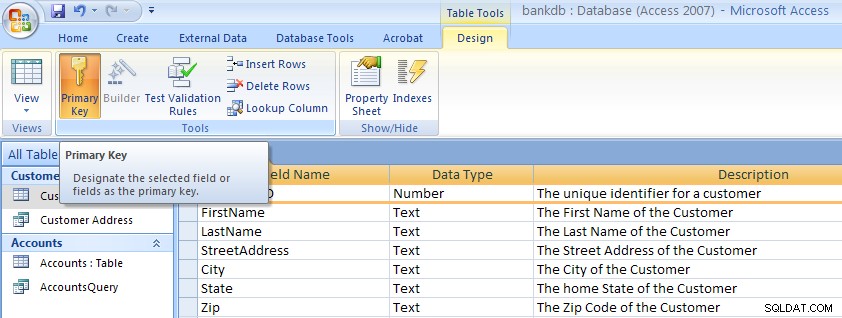 Notez qu'une petite clé apparaît à côté du nom du champ sur le côté gauche.Remarque :pour supprimer une clé primaire , répétez simplement cette procédure pour désactiver la clé primaire.
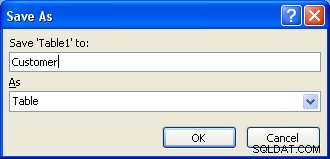
- En dernier lieu, le tableau doit être enregistré. Déroulez le menu Office et choisissez l'élément de menu Enregistrer sous. Une boîte de dialogue apparaîtra où le nom de la nouvelle table doit être spécifié. Notez qu'Access donne un nom par défaut tel que Table1 ou Table2 . Saisissez simplement ce nom par défaut avec le nom de la table. Pour cet exemple, nommez la table :Client Cliquez ensuite sur le bouton OK.
À ce stade, la nouvelle table Client a été créée et enregistrée.
Remarque sur la dénomination des champs (colonnes) dans MS Access
Lors de la définition des champs (colonnes) d'une table, il est important d'utiliser des noms de champs qui donnent une compréhension claire du contenu des données de la colonne. Par exemple, le champ CNO indique-t-il un Numéro Client ou un Numéro Conteneur ?
Les noms de champ dans Access peuvent comporter jusqu'à 64 caractères et peuvent contenir des espaces. Toutefois, l'utilisation d'espaces dans les noms de champs et les noms de tables est fortement déconseillée . Si vous souhaitez faciliter la lecture des noms de champs, envisagez d'utiliser un caractère de soulignement pour séparer les mots. Cependant, assurez-vous qu'aucun espace n'apparaît avant ou après le trait de soulignement.
Le tableau suivant résume différentes manières de donner des noms de champs :
| Description | Mauvais | Bien |
|---|---|---|
| Identifiant unique pour un client | CID | CustomerID ou Customer_ID |
| Description d'un produit | PDESC | Description du produit |
| Numéro de téléphone personnel de l'employé | Employee_home_telephone_number | Téléphone personnel |
| Numéro de compte bancaire | BA# | Numéro de compte |
5.2 Exercice :Créer un tableau
Créer les comptes table en suivant les mêmes étapes que celles utilisées pour créer la table Client.
- Cliquez sur l'onglet Créer, puis cliquez sur le tableau bouton.
- Déroulez le menu Affichage et choisissez Conception. La vue de conception de table apparaîtra. Remplissez le Nom du champ , Type de données et Description pour chaque colonne/champ de la table Comptes.
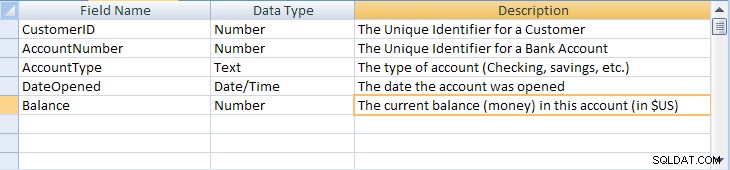
Nom du champ Type de données Description ID client Numéro L'identifiant unique d'un client Numéro de compte Numéro L'identifiant unique d'un compte bancaire Type de compte Texte Le type de compte (chèque, épargne, etc.) Date d'ouverture Date La date d'ouverture du compte Solde Numéro Le solde actuel (argent) de ce compte (en $US) Une figure montrant la vue de conception avec la nouvelle définition de table remplie est donnée ci-dessous :
- Définissez une clé primaire pour la table des comptes. Cliquez sur le numéro de compte champ avec le Droit bouton de la souris et choisissez Clé primaire dans le menu contextuel.
- Enregistrez le nouveau tableau Comptes en déroulant le menu Fichier et en choisissant l'élément de menu Enregistrer. Renseignez le nom du tableau :Comptes Cliquez ensuite sur le bouton OK.
Notez qu'il existe un certain nombre d'étapes supplémentaires que l'on peut suivre pour améliorer et embellir les tables dans MS Access, notamment la spécification de valeurs par défaut, la création de valeurs de recherche et le masquage des entrées de données pour suivre un modèle spécifique. Les détails ne sont pas importants pour ce didacticiel actuel, mais si vous êtes intéressé, consultez la page de conception de table MS Access avancée liée ici.
5.3 Afficher et ajouter des données à un tableau
Les données peuvent être ajoutées, supprimées ou modifiées dans des tableaux à l'aide d'un simple affichage de type tableur. Pour afficher cette vue des données d'une seule table, mettez en surbrillance le nom de la table, puis double-cliquez sur le nom de la table.
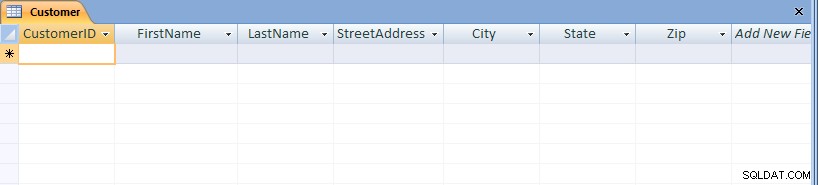
Dans cette vue de la table Customer, illustrée dans la figure ci-dessous, les champs (colonnes) apparaissent en haut de la fenêtre et les lignes ou enregistrements apparaissent en dessous. Cette vue est similaire à la conception d'une feuille de calcul.
Notez qu'en bas de la fenêtre le nombre d'enregistrements est affiché. Dans ce cas, puisque la table vient d'être créée, un seul enregistrement vide apparaît.
Pour ajouter des données au tableau, saisissez simplement des valeurs pour chacun des champs (colonnes). Appuyez sur la touche Tab pour vous déplacer entre les champs d'un enregistrement. Utilisez les touches fléchées haut et bas pour vous déplacer entre les enregistrements. Entrez les données comme indiqué ci-dessous :
| ID client | Prénom | Nom | Adresse de rue | Ville | État | Zip |
|---|---|---|---|---|---|---|
| 1001 | Joseph | Smith | 123 Lexington | Smithville | KY | 91232 |
| 1002 | Alberta | Jones | 12, avenue Davis | Smithville | KY | 91232 |
| 1003 | Nathanial | Hache | 443 Grinder Ln. | Broadville | AG | 81992 |
| 1004 | Pauline | Constructeur | 661, chemin Parker | Streetville | AG | 81990 |

Pour enregistrer les nouvelles données, déroulez le menu Office et choisissez Enregistrer.
Pour naviguer vers d'autres enregistrements du tableau, utilisez la barre de navigation en bas de l'écran :
Pour modifier des données existantes, naviguez simplement jusqu'à l'enregistrement qui vous intéresse et tabulez jusqu'au champ approprié. Utilisez les touches fléchées et les touches de suppression ou de retour arrière pour modifier les données existantes.
Pour supprimer un enregistrement, accédez d'abord à l'enregistrement qui vous intéresse. Ensuite, déroulez le menu Edition et choisissez l'élément de menu Supprimer.
Pour fermer le tableau et revenir à l'écran principal d'accès, déroulez le menu Fichier et choisissez l'élément de menu Fermer.
Exercice 5.4 :Ajouter des données à un tableau
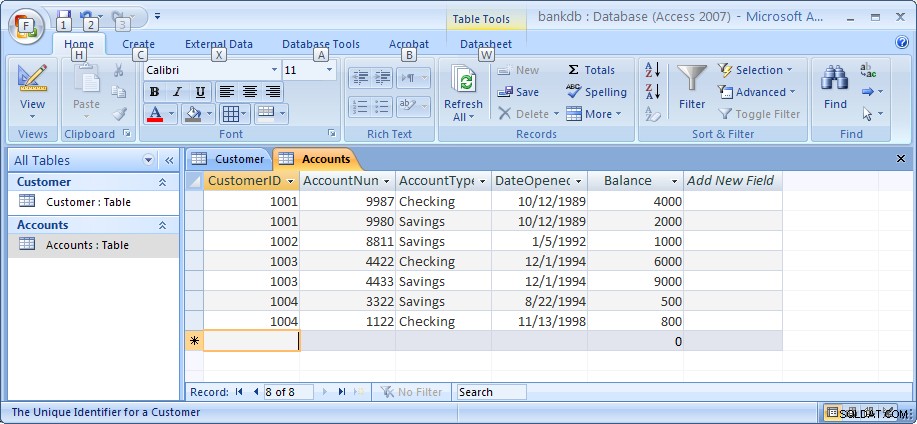
Pour cet exercice, ouvrez la table Accounts et ajoutez les données des sept comptes indiqués dans la section 2. Assurez-vous de saisir les données exactement comme indiqué, y compris la casse des données dans le champ AccountType. par exemple, tapez Épargne au lieu d'épargne ou d'ÉPARGNE.
Notez que lors de la saisie des dates, tapez les quatre chiffres complets de l'année. Par défaut, Access affiche les 4 chiffres de l'année (l'ancienne version d'Access n'affichait que deux chiffres).
Assurez-vous de sauvegarder les données lorsque vous avez terminé. La figure ci-dessous montre le tableau Comptes et les données tels qu'ils devraient apparaître lorsque vous avez terminé cet exercice.
À ce stade du didacticiel, nous avons créé deux tables, Clients et Comptes, et ajouté des données à chacune. Dans les sections suivantes, nous expliquerons comment interroger et générer des rapports sur les données des tableaux et comment créer un formulaire de saisie de données convivial à l'aide des assistants d'accès.
Remarque :Mon tutoriel sur MS Access Advanced Table Design se trouve sur ce lien. Vous voudrez peut-être vérifier cela après avoir terminé le reste de ce didacticiel.
5.5 Création de relations entre les tables
Rappelons que l'une des principales caractéristiques des bases de données relationnelles est le fait que toutes les tables sont liées les unes aux autres. Jusqu'à présent, dans la base de données Bank, la table Customers est liée à la table Accounts en vertu du champ CustomerID apparaissant dans les deux tables. Access dispose d'un moyen de rendre cette relation explicite à l'aide de l'écran Relations. Access utilise ces informations lors de la conception de rapports, de formulaires et de requêtes nécessitant l'affichage de plusieurs tables.
Pour commencer, assurez-vous que la table Comptes et la table Clients sont toutes deux fermées. Access arrêtera la création de toute relation si la table est actuellement ouverte. Pour fermer un tableau, faites un clic droit sur le nom du tableau dans l'onglet au-dessus du tableau et choisissez l'élément de menu de fermeture, ou cliquez sur le petit X juste au-dessus du tableau.

Ensuite, affichez l'écran Relations en cliquant sur l'onglet Outils de base de données, puis cliquez sur le bouton Relations comme indiqué ci-dessous. 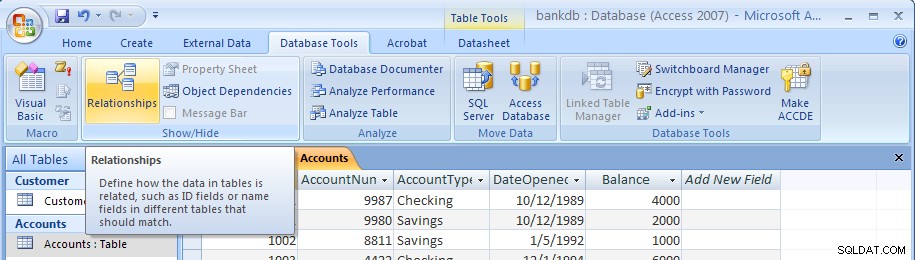
L'écran Relations vide apparaîtra comme suit :
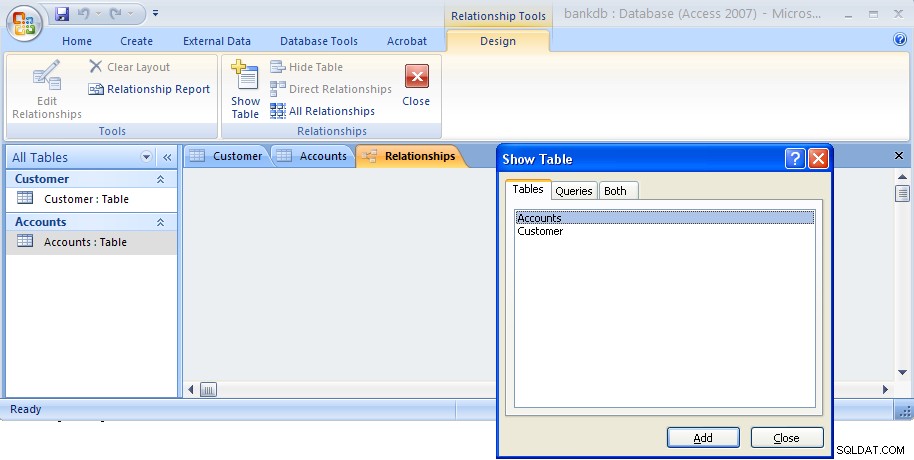
La boîte de dialogue Afficher la table apparaîtra par défaut. Mettez en surbrillance la table Clients et la table Comptes comme indiqué ci-dessous, puis cliquez sur le bouton Ajouter.

Cliquez ensuite sur le bouton Fermer pour fermer cette boîte de dialogue. L'écran Relations va maintenant réapparaître avec les deux tableaux affichés comme ci-dessous :
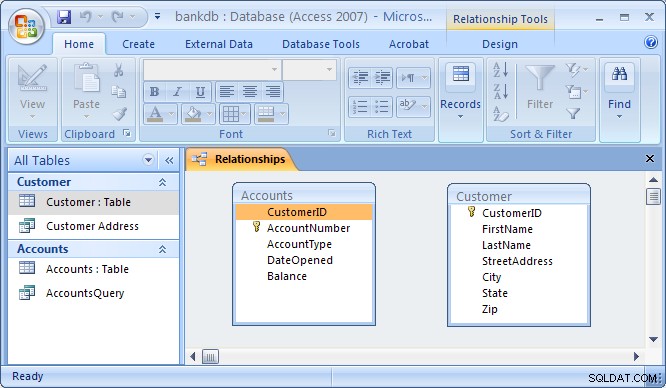
Pour connecter la table Customers à la table Accounts afin de former une relation, cliquez sur le champ CustomerID dans la table Customers et faites-le glisser au-dessus du champ CustomerID dans la table Accounts. Lorsque vous relâchez le bouton de la souris, la boîte de dialogue Modifier les relations apparaît comme ci-dessous :
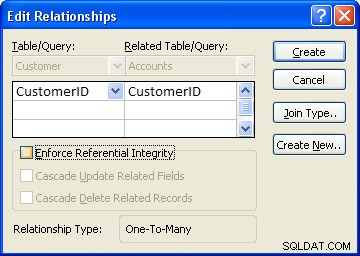
Access fera de son mieux pour déterminer le type de relation (presque toujours, il sélectionnera Un à plusieurs ). Pour cet exemple, Access sait que CustomerID est une clé de la table Customer, il choisit donc ce champ comme côté "Un". Cela fait de la table Comptes le côté "Plusieurs" en tant que Un le client peut en avoir beaucoup accounts.
One additional step to be taken is the check off the box labeled “Enforce Referential Integrity”. This option puts constraints into effect such that an Accounts record can not be created without a valid Customer record, and Access will also prevent a user from deleting a Customer record if a related Accounts record exists. At this point, click on the Create button to create the relationship. The Relationships screen should reappear with the new relationship in place as follows:
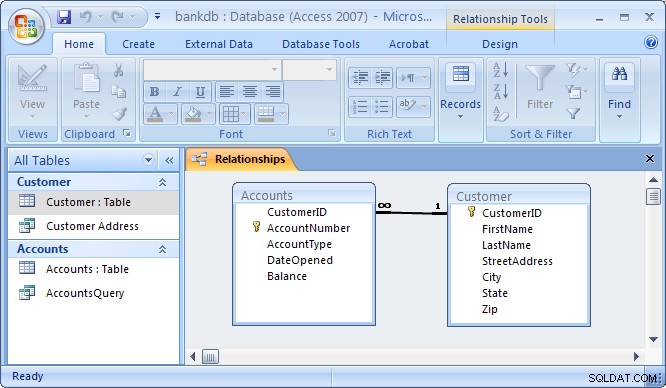
Note the symbols “1” (indicating the “One” side) and the infinity symbol (indicating the “Many” side) on the relationship. Close the relationships screen and select Yes to save the changes to the Relationships layout.
If the relationship does not appear in the above fashion, highlight it and press the delete key to delete it. Then go back to the table design view and make certain that the CustomerID field is designated as the key of the Customers table. Then go back to the Relationships screen and try to recreate the relationship.
5.6 Review of Creating and Viewing Tables
Creating a new table requires the following steps:
- Click on the Tables tab on the Access main screen
- Click on the New button.
- Choose the Design View and click the OK button.
- Fill in the name, data type and description of each of the fields in the table.
- Designate a primary key by clicking on one of the fields with the right mouse button and then choose Primary Key from the pop-up menu.
- Save the table by pulling down the File menu and choosing Save.
- Close the new table by pulling down the File menu and choosing Close.
To change the design of an existing table (e.g., to add, change or delete a field):
- Click on the Tables tab on the Access main screen
- Highlight the name of the table to be modified and click on the Design button.
- Make the necessary changes.
- Save the table by pulling down the File menu and choosing Save.
- Close the table by pulling down the File menu and choosing Close.
To add, delete or change data in an existing table:
- Click on the Tables tab on the Access main screen
- Highlight the name of the table to be modified and click on the Open button.
- Make the necessary changes to the data.
- Save the table data by pulling down the File menu and choosing Save.
- Close the table by pulling down the File menu and choosing Close.
To create or edit relationships between tables:
- Pull down the Tools menu and select the Relationships menu item.
- To display tables, right click and choose Add Tables
- To create new relationships, drag a key field from one table and drop it on the associated field in another table
- To edit an existing relationship, double click on the relationship line.
- To delete an existing relationship, click on the relationship line and press the delete key.
6 Creating and Running Queries
Queries are a fundamental means of accessing and displaying data from tables. Queries can access a single table or multiple tables. Examples of queries for our bank database might include:
- Which Customers live in Georgia ?
- Which Accounts have less than a $500 balance ?
- What is the total amount of money deposited by each Cusomter?
- Which Checking account has the largest balance?
Queries can be used to carry out other tasks such as for creating formatted reports and data entry forms, and for exporting subsets of data to Excel or another software program.
In this section, we show how to use the Access Wizards to create queries for a single table and for multiple tables.
6.1 Single Table Queries
In this section, we demonstrate how to query a single table. Single table queries are useful to gain a view of the data in a table that:
- only displays certain fields (columns) in the output
- sorts the records in a particular order
- performs some statistics on the records such as calculating the sum of data values in a column or counting the number of records, or
- filters the records by showing only those records that match some criteria. For example, show only those bank customers living in GA.
Creating a query can be accomplished by using either the query design view or the Query wizard. In the following example, we will use the query wizard to create a query.
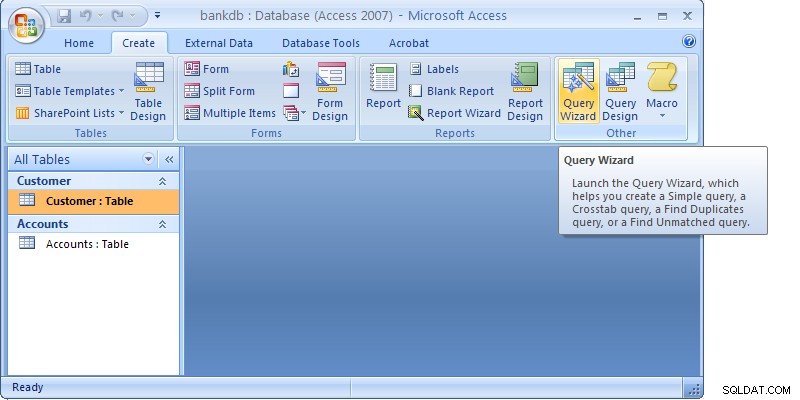
To create a new query, click on the Create tab. Then click on the Query wizard button.
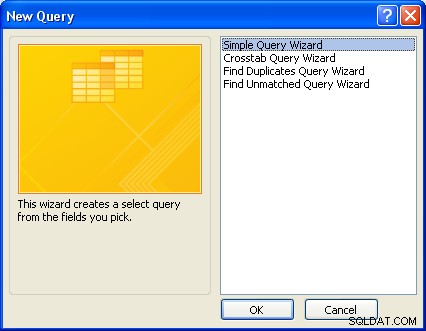
When the Query wizard appears, highlight the Simple Query Wizard selection and click on the OK button.
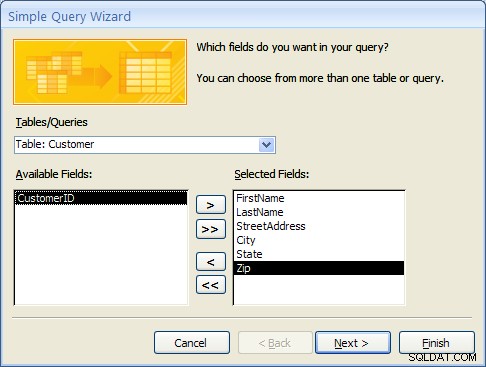
The first step in the Simple Query wizard is to specify the table for the query and which fields (columns) should be displayed in the query output. Three main sections of this step are:
- Tables/Queries – A pick list of tables or queries you have created.
- Available Fields – Those fields from the table that can be displayed.
- Selected Fields – Those fields from the table that will be displayed.
For this example, pull down the Tables/Queries list and choose the Customer table. Notice that the available fields change to list only those fields in the Customer table. This step is shown below:

From the list of Available fields on the left, move the FirstName, LastName, StreetAddress, City and State fields over to the Selected Fields area on the right. Highlight one of the fields and then click on the right arrow button  in the center between the two areas. Repeat this for each of the four fields to be displayed. When done with this step, the wizard should appear as below:
Click on the Next button to move to the next and final step in the Simple Query wizard.
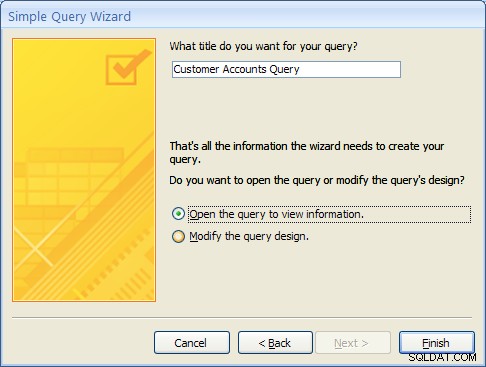
In the final step, give your new query a name. For this example, name the query:Customer Address
At this point, the wizard will create the new query with the option to either:
- Open the query to view information – that is, the wizard will execute the query and show the data.
- Modify the query design – the wizard will switch to the Design View to allow further modification of the query.
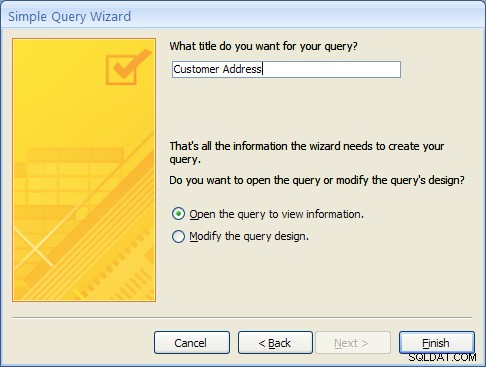
For this example, choose Open the query to view information and click on the Finish button. When this query executes, only the customer’s name, address, city and state fields appear, however, all of the rows appear as shown in the figure below:

Close this query by clicking on the X in the upper right corner of the query results as shown in the figure below:
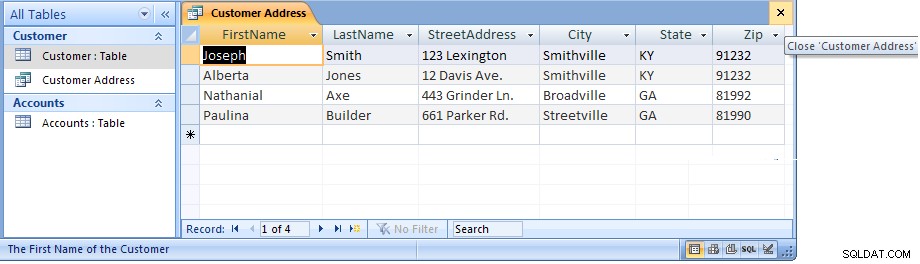
The Access main screen showing the Queries tab should appear. Note the new query Customer Address appears under the Customers table.
6.1 Single Table Queries (Continued)
In the following example, we will modify the Customer Address query to only display customers in a certain state. To accomplish this, we will make use of the Query Design View.
Open up the Customer Address query in the design view by right-clicking on the name of the query. Then select the Design View menu item as shown below.
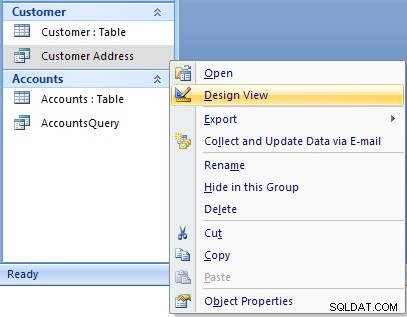
The design view will appear as in the figure below:
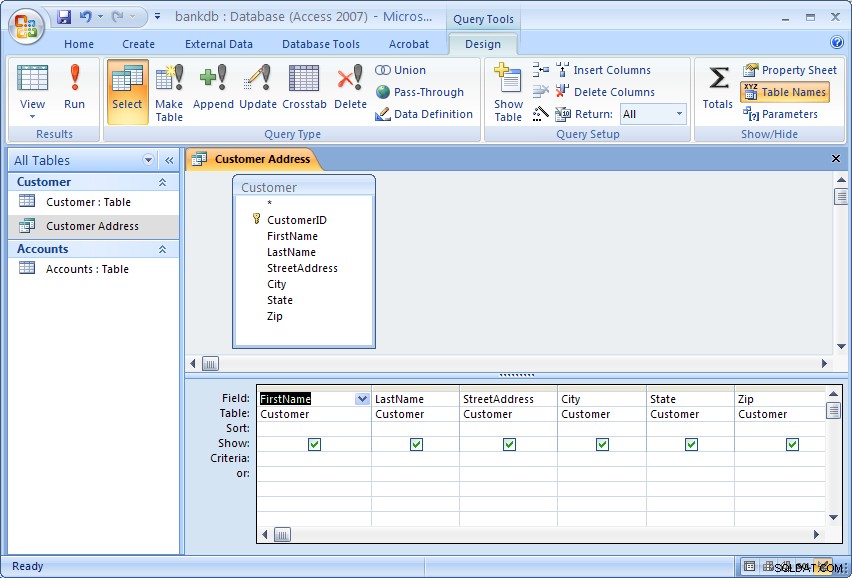
The Query Design view has two major sections. In the top section, the table(s) used for the query are displayed along with the available fields. In the bottom section, those fields that have been selected for use in the query are displayed.
Each field has several options associated with it:
- Field – The name of the field from the table
- Table – The table the field comes from
- Sort – The order in which to sort on this field (Ascending, Descending or Not Sorted)
- Show – Whether or not to display this field in the query output
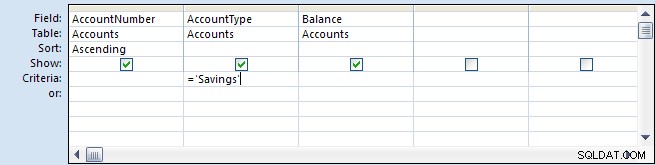
- Criteria – Indicates how to filter the records in the query output.
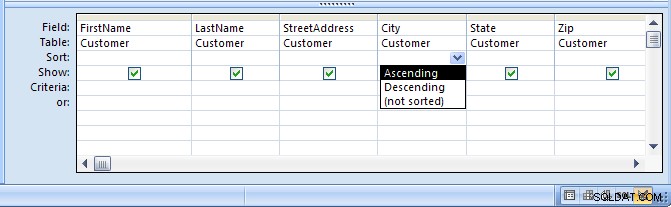
For this example, we will filter the records to only display those customers living in the State of Georgia (GA). We will also sort the records on the City field.
To sort the records on the City field, click in the Sort area beneath the City domaine. Choose Ascending from the list as shown in the figure below:
To filter the output to only display Customers in Georgia, click in the Criteria area beneath the State field and type the following statement: ='GA'
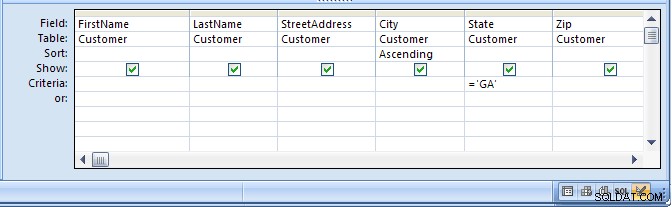
The ='GA' statement tells Access to only show those records where the value of the State field is equal to ‘GA’. Note the use of single quotes to surround the characters.
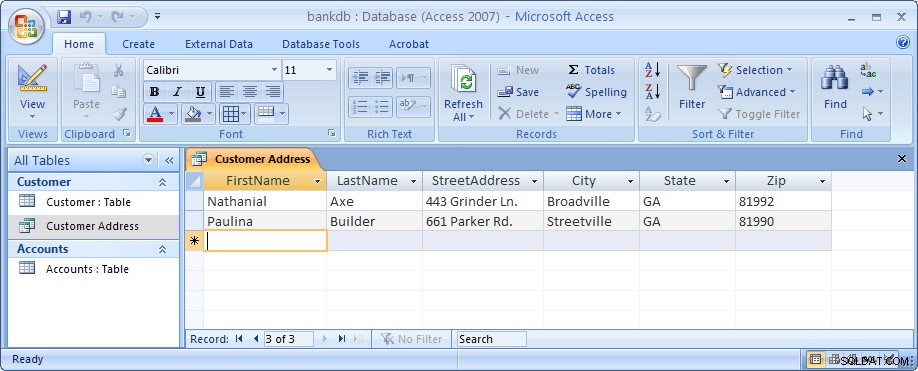
Run the query by clicking on the Run button (with the large red exclamation point). The output is shown in the figure below:
Finally, save and close this query to return to the Access main screen.
6.2 Exercise:Single Table Queries
For this exercise, use the Simple Query wizard to create a query on the Accounts table showing just the AccountNumber, AccountType and Balance fields.
- From the Access main screen, click on the Create tab. Then click on the Query Wizard button.
- Choose the Simple Query wizard option and click on the OK button.
- Under Table/Queries:choose the Accounts table. Then move the AccountNumber, AccountType and Balance fields over to the Selected fields area. Then click the Next button.
- In the next panel, you will be asked to choose between a detail or summary query. Choose detailed query and click on the Next button.
- Name the new Query :AccountsQuery and click on the Finish button.
The output is shown below:

Close this query by pulling down the Office menu and choosing Close.
In the next part of the exercise, we will modify the query to sort the output on the account number and only display the Savings accounts.
- From the Queries tab on the Access main screen, highlight the AccountsQuery and click on the Design button.
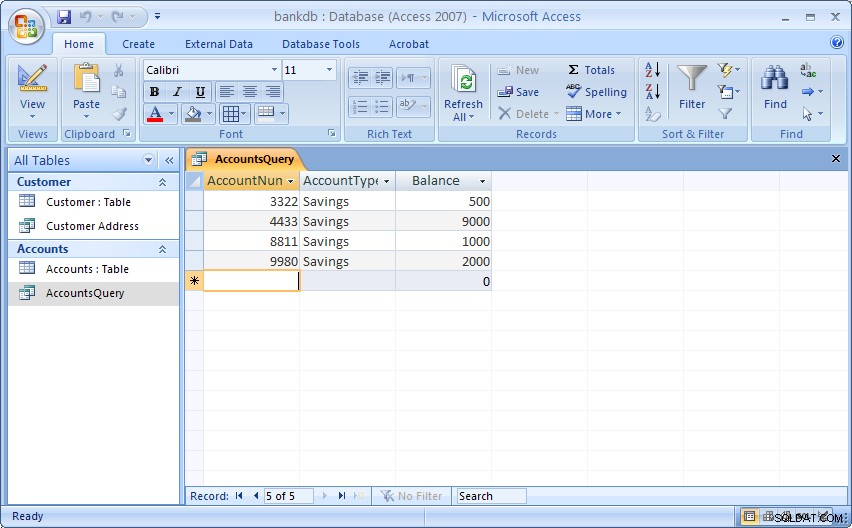
- Change the Sort order for the AccountNumber field to Ascending.Add the following statement to the Criteria:are under the AccountType field:=‘Savings’
- Run the query by double-clicking on the AccountsQuery name. The output is shown below:
- Finally, save and close the query to return to the Access main screen.
6.3 Multiple Table Queries
Up to this point, queries involving only one table have been demonstrated. It is almost a given that queries will need to involve more than one table. For this example, assume that a manager would like to see a list of all of the customers and the type of account(s) that each one maintains at the bank. Such a query requires data from both the Customers table as well as the Accounts table. In such queries, Access will rely on the Relationships established between tables to guide how the data will be assembled to satisfy the query.
Before proceeding with these next instructions, make certain the One-to-Many relationship between the Customers and Accounts table has been created (see section 5.5 Creating Relationships for a review of this process).
To start the process of creating a multiple table query, highlight the Create tab and click on the Query Wizard button to create a new query. Select the “Simple Query Wizard” option as was done previously.
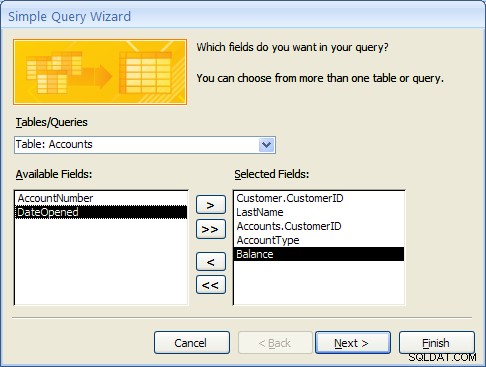
When the simple query wizard appears, select the CustomerID and LastName fields from the Customers table, then switch the Tables/Queries selection to the Accounts table and select the CustomerID, AccountType and Balance fields from the Accounts table. The result from this step is down below:
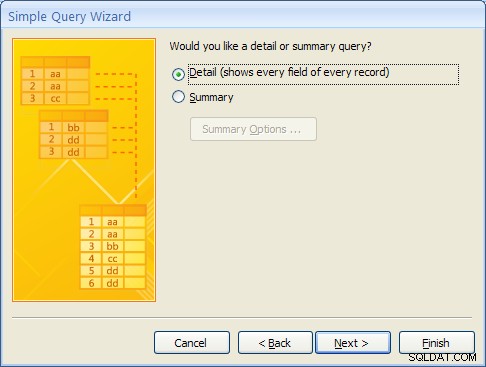
Click the Next button to continue. In the next step of the wizard, an option will appear to provide some level of Summary. For this example, leave the default at “Detail …” as shown below and then click on the Next button.
In the final step of the wizard, name the query “Customer Accounts Query” and click on the Finish button. The multiple table query results should appear as follows:
MS Access knows how to line up (or “join”) the accounts table to the Customer table for this query due to the relationship that was created when the tables were first defined.
As with single table queries demonstrated previously, one can change the query definition in design view by adding filters (e.g., show account information for all customers in ‘GA’).
6.4 Exercise:Multiple Table Queries
For this exercise, create a new query called “Accounts Summary Query” that joins the Customers table (include the CustomerID and LastName fields) with the Accounts table (include the Balance field only). In the second step of the wizard, click on the Summary choice (instead of Details) and then click on the Summary Options… button. Check off all of the Summary option boxes such as Sum , AVG , Min and Max as shown in the figure below:
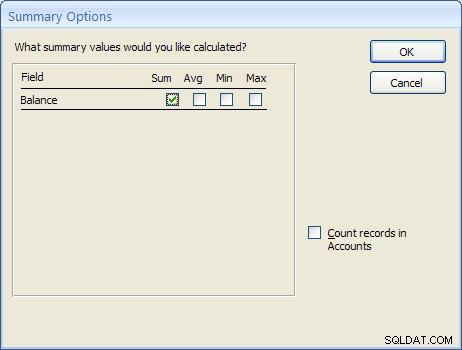
The resulting query should appear as follows:
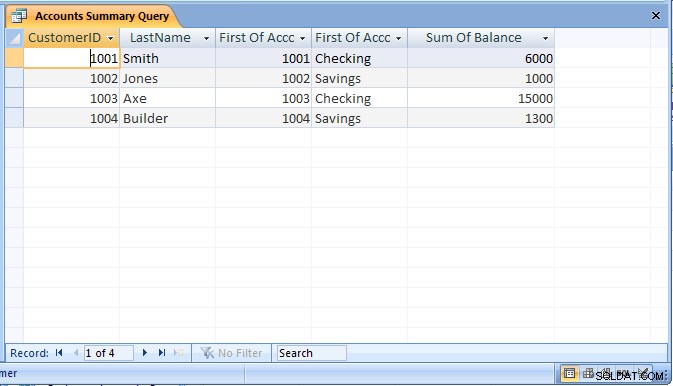
Be sure to save the query as “Accounts Summary Query”.
6.5 Review of Creating and Running Queries
In this section, the basic steps for creating and running queries were introduced. The query wizard can be used to create simple queries that access a single table. It is also possible to then modify the query to sort or filter the records.
Creating a query using the query wizard:
- From the Access main screen, click on the Queries tab. Then click on the New button.
- From the Queries tab on the main Access screen, click on the New button and choose the Simple Query wizard option.
- Under Table/Queries:choose the appropriate table for the query and then indicate which fields in the table will appear in the query output.If querying more than one table, change the Table/Queries:selection to display additional tables and select the necessary fields.
- If the table contains numeric fields, either detailed or summary information may be specified for the query.
- Finally, name the new query and click on the Finish button.
As a final note, Forms and Reports can be created based on existing queries.
7 Creating and Running a Data Entry Form
Data entry forms are the primary means of entering data into tables in the database. In a previous section, we described how to add data to a table using a spreadsheet-like view of the data. Data entry forms offer a more user-friendly interface by adding labels for each field and other helpful information.
Access provides several different ways of creating data entry forms. These include:
- Creating the forms by hand using a Design View
- Creating a default form based on all of the fields available in a table or a query
- Creating a form based on a number of different wizards that walk the user through the forms creation process.
As with queries, a data entry form can be based on a single table or it can work on multiple tables at the same time.
In this section, we cover the basic steps for using a wizard to create a data entry form based on a single table. After this exercise, a multiple-table form is demonstrated.
7.1 Creating a Single Table Form using the Wizard
In this example, we will create a simple data entry form for the Customer table. To begin the process, click on the Create tab on the Access main screen. As with the other components in Access, there are buttons for creating a New form, Open an existing form and Design an existing form. For this example, click on the New button to create a new form.
Several buttons for creating a new form will appear. For this tutorial, choose the Form wizard.
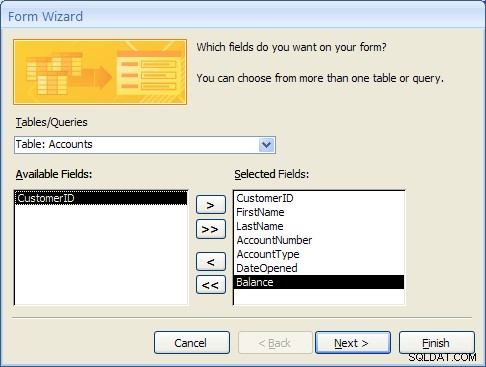
In the first step of the Form wizard, we need to specify the fields from the Customer table that will appear on the form. In this case, we want all of the fields to appear. Move each of the fields from the Available Fields side over to the Selected Fields side as in the following figure. Then click on the Next button.

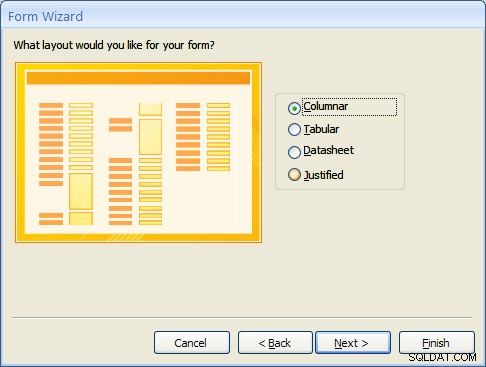
Forms can have several different layouts or arrangement of the labels and fields on the screen.
- Columnar – Places the labels to the left of each field. This is similar to a paper form. This layout is suitable for viewing data one record at a time.
- Tabular – Places the field labels at the top of the screen and the records are displayed below. This is similar to how a spreadsheet would display the data and is suitable for displaying multiple records of data at a time.
- Datasheet – The data appears in the same fashion as when viewing or adding data to a table.
- Justified – Places the labels above each field with the fields spread out on the form. This is suitable for viewing a single record at a time as with the columnar layout.
For this example, choose the columnar layout as shown in the figure below and click on the Next button.
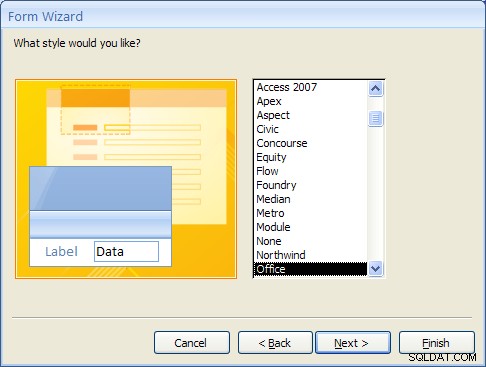
At this point, MS Access 2007 and 2010/2013 versions are a bit different. Access 2007 will show several sample display styles that determine how the form will appear, including elements such as fonts, colors and the background used in the form. Access 2010 and 2013 skips this step in this wizard and provides styles that can be applied to the form in Design mode. For this example, for MS Access 2007, select the Office style as shown below and click on the Next button.

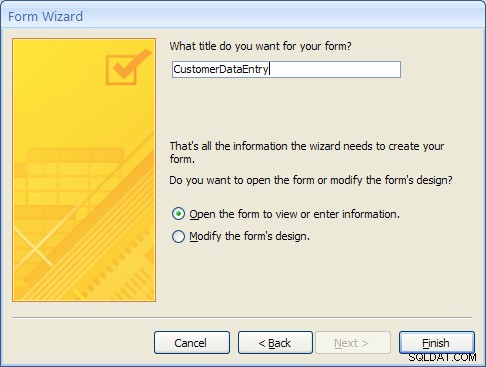
As a final step, give this new form the name:CustomerDataEntry and then click on the Finish button as shown below:
The new form will be created by the wizard and then opened. It should appear as in the figure below:
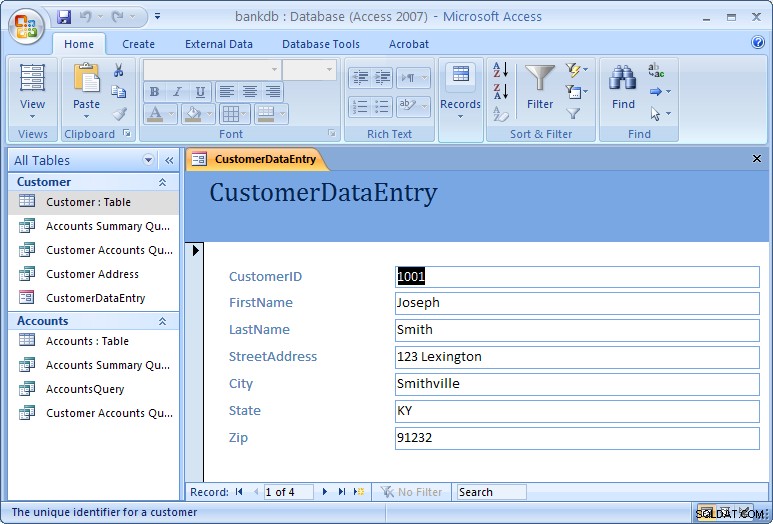
Use the tab key to navigate between fields in the form. To move to the next or previous record, use the record navigation bar at the bottom of the form:
The buttons on the navigation bar perform the following functions:
 | Go to the first record. |
 | Go to the previous record. |
 | Go to the next record. |
 | Go to the last record.  Go past the last record to add a new record. Go past the last record to add a new record. |
To close the form and return to the Access main screen, pull down the File menu and choose Close.
To open the form at any time, highlight the form name under the Forms tab on the Access main screen and click on the Open button.
One quick final note on forms. When the form is created, MS Access looks at how the table is designed and creates the form based on the properties of the table. If you make any changes to the table, you will need to re-create the form again in order to see those table changes reflected in the form. One example where this might happen is is if you change a column in your table from a text box to a combo box, or if you add or remove any columns from your table.
7.2 Exercise:Creating a Single Table Form
For this exercise, we will create a data entry form for the Accounts table created in a previous exercise.
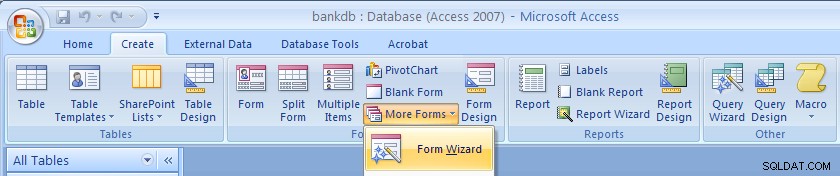
- Click on the Create tab on the Access main screen and then click on the More Forms… button and the “Forms Wizard” to create a new form.
- Select the Accounts table and all of the available fields and click on the Next button.
- Choose a Tabular layout and click on the Next button.
- For Access 2007 choose the Office style and click on the Next button.
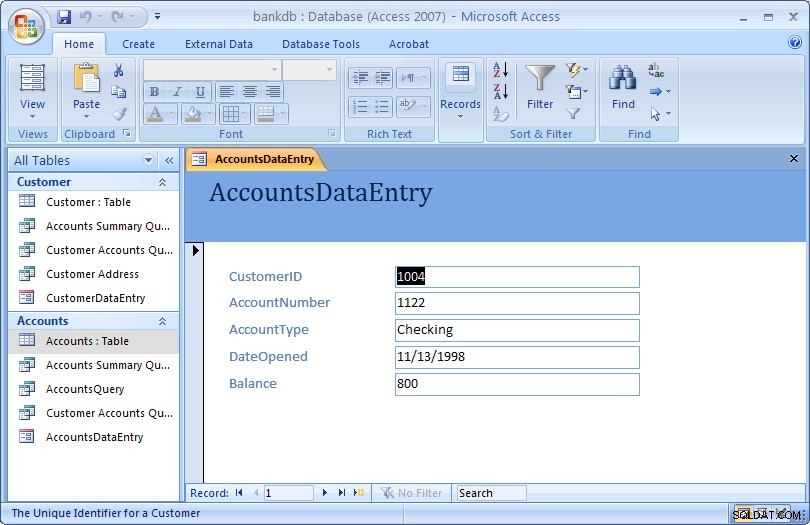
- Name the form:AccountsDataEntry Then click on the Finish button to create, save and view the new form.
The new form is shown in the figure below:
Close the form and return to the Access main screen, by pulling down the File (or Office) menu and choosing Close.
7.3 Review of Creating and Running a Data Entry Form
The basic steps for creating a simple data entry form are:
- Choose a table and a form wizard
- Specify the fields (columns) that will appear in the form
- Specify the layout for the form
- Specify the style (fonts/colors, etc.) for the form
- Save, create and run the new form
In this section we covered the basic steps required to create and run a data entry form. Access provides wizards which are adept at building simple forms with a minimal amount of work. More advanced work on forms would concentrate on using the Design View to change a form’s appearance and to add or remove fields and labels once a form is created. A more advanced tutorial on MS Access Forms Design is linked here.
8 Creating and Running a Report
Reports are similar to queries in that they retrieve data from one or more tables and display the records. Unlike queries, however, reports add formatting to the output including fonts, colors, backgrounds and other features. Reports are often printed out on paper rather than just viewed on the screen. They can also be attached to e-mail and exported and posted as web pages.
As with data entry forms, there are a number of ways to create reports in MS Access:
- A report can be created “by hand” in Design view
- A default report can be created automatically based on all of the firleds for a given table.
- A report can be created using the Create Report wizard.
In this section, we cover how to create simple reports using the Report wizard.
8.1 Creating a Single Table Report using the Wizard
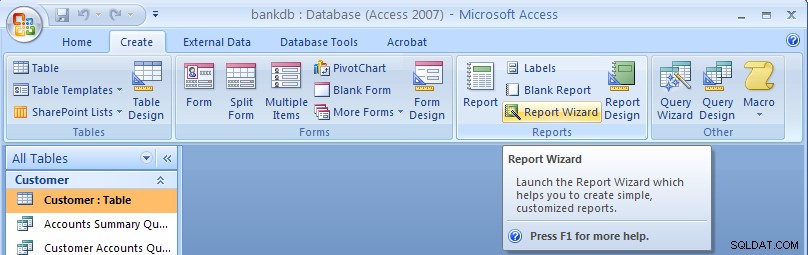
In this example, we will create a simple report for a single table using the Report wizard. As with the Queries and Forms, we begin by selecting the Create tab from the Access main screen.
To create a new report, click on the Report Wizard button.
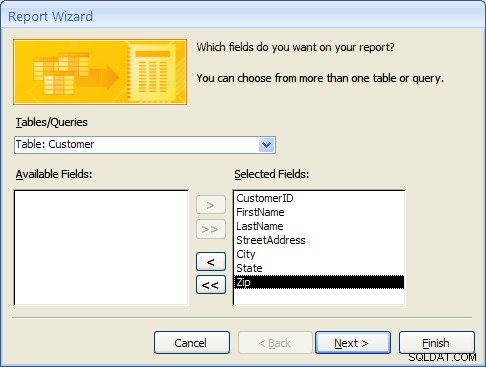
In the next step of the Report wizard, is used to specify the fields from the Customer table that will appear on the report. In this case, we want all of the fields to appear. Move each of the fields from the Available Fields side over to the Selected Fields side as in the following figure. Then click on the Next button.
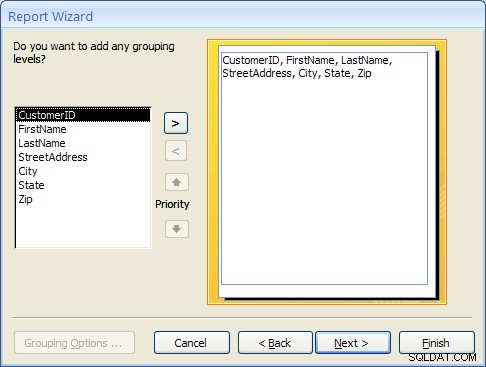
In the next step, we have the opportunity to add Grouping Levels to the report. A grouping level is where several records have the same value for a given field and we only display the value for the first records. In this case, we will not use any grouping levels so simply click on the Next button as shown below.
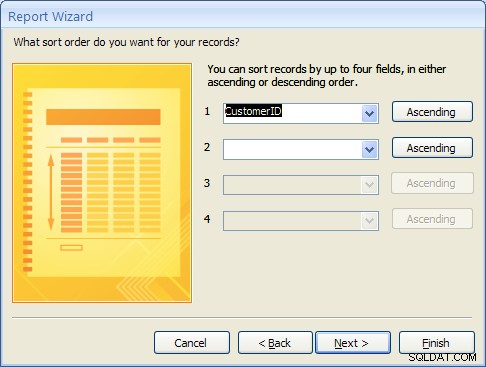
In the next step, the sorting order of the report can be specified. For this example, we will sort the records on the CustomerID field. To achieve this, pull down the list box next to the number 1:and choose the CustomerID field as shown in the figure below. Then click on the Next button.
8.1 Creating a Single Table Report using the Wizard (Continued)
The next step is to specify the layout of the report. The three options are:
- Columnar – Places the labels to the left of each field. This is similar to a paper form.
- Tabular – Places the field labels at the top of the report page and the records are displayed below. This is similar to how a spreadsheet would display the data.
- Justified – Places the labels above each field with the fields spread out on the report page.
Generally, reports use the tabular layout. For this example, choose Tabular layout and set the page Orientation to Landscape so that all of the fields will fit across one page. This is shown in the figure below. Click on the Next button to continue.

In the next step, the style of the report can be selected. For this example, choose the Office style and click on the Next button to continue.

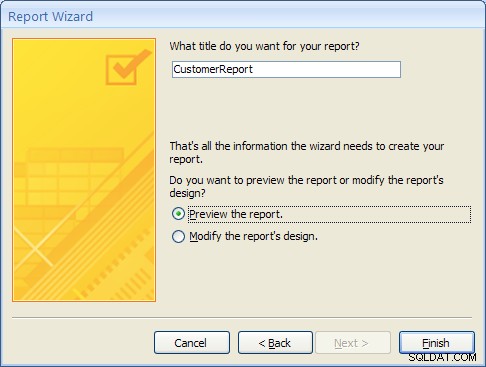
Finally, give a name for the new report:CustomerReport and then click on the Finish button to create, save and display the new report.
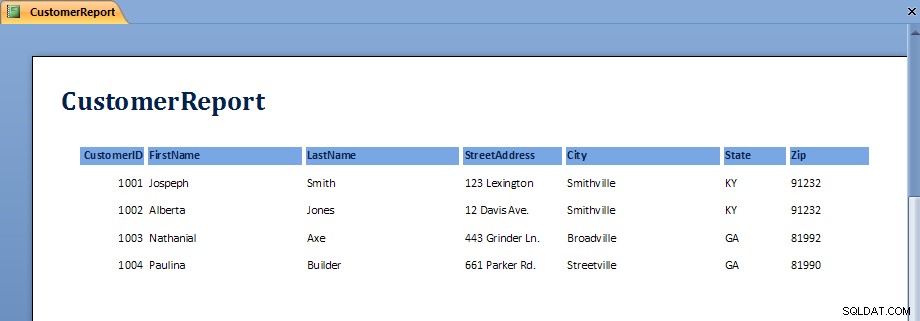
The output from the report is shown in the figure below. Note that on some screens, the last field, Zip, may not display without scrolling over to the right.
Once the report is displayed, it can be viewed, printed or transferred into Microsoft Word or Microsoft Excel. The button bar across the top of the screen has the following functions:
 | Print the report |
 | Zoom into a region of the report |
 | Display the report as one, two or multiple pages |
 | Zoom into or out of the report |
 | Transfer the report into MS Word |
 | Close the report |
To close the report and return to the Access main screen, click on the Close button.
8.2 Exercise:Creating a Single Table Report
For this exercise, we will create a report showing all of the Accounts information.
- From the Access main screen, click on the Create tab and Click on the Report wizard.
- Select all of the fields in the Accounts table by moving them all over to the Selected Fields side and then click Next
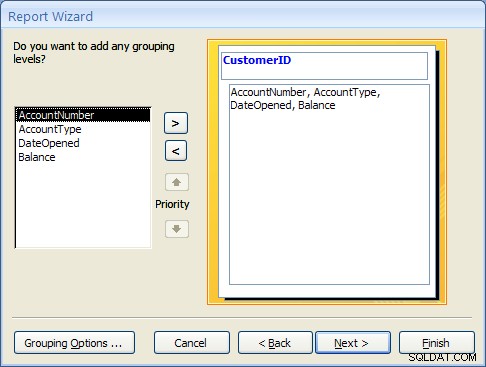
- Group the report by CustomerID by clicking on the CustomerID field and then clicking on the right arrow button. This is shown in the following figure:
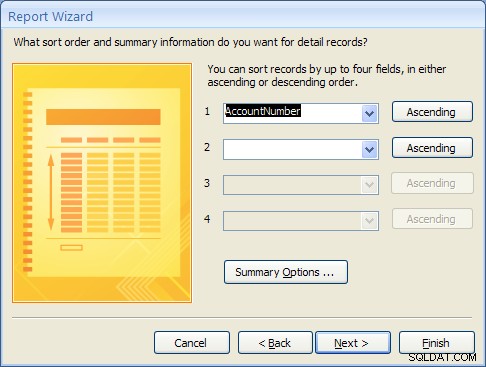
Click on the Next button to continue. - Choose to sort the report on the AccountNumber domaine. Note that a new button will appear called Summary Options.
Click on the Summary Options button. Choose the Balance field and select the Sum option. Choose the option to show both Detail and Summary data. Then click on the OK button.

Click on the Next button. - Choose a Block layout and click on the Next button.
- Choose the Corporate style and the click on the Next button.
- Finally, name the report:AccountsReport and click on the Finish button to create, save and run the report.
The output from the AccountsReport is shown below:
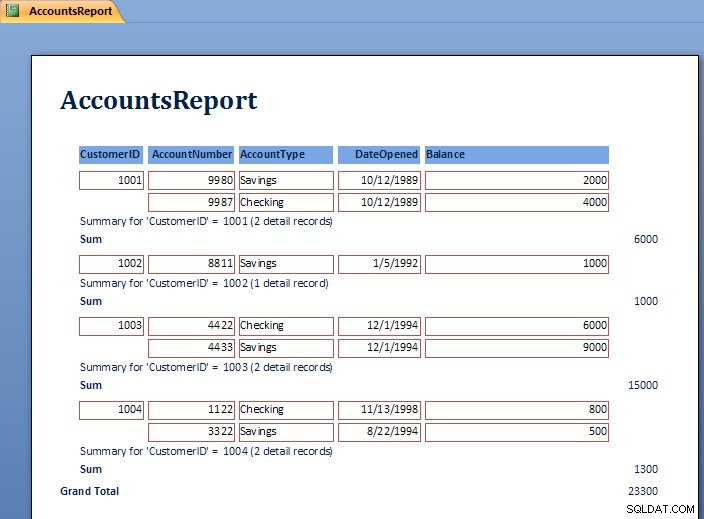
Note the Grouping at the level of the CustomerID and the Sum for each customer’s balances.
To close the report and return to the Access main screen, pull down the File menu and choose Close.
8.3 Review of Creating and Running a Report
As can be seen in the report exercise, there are many ways to create reports to show summation, sorting and layout of the data. Further study of Reports will show how to modify the layout using the Design View. Students are encouraged to work with the Report wizards to create different styles and types of reports.
9 Creating and Running a Master/Detail Form
Master/Detail forms are used to display data from two tables at the same time. MS Access calls the “details” a “subform”. The forms are linked according to the relationship between the tables. Recall that in the example database, the CustomerID is used to link the Customer table (Master) to the Accounts table (Detail). In this section a master / detail form for the Customer and Accounts tables will be created.
- From the Access main screen, click on the Create tab and Click on the “More Forms…” section and finally the “Forms Wizard”.Select the Customer table first and move the CustomerID, FirstName and LastName fields to the Selected Fields list.Next, select the Accounts table and move the AccountNumber, AccountType, DateOpened and Balance fields to the Selected Fields list as shown below.
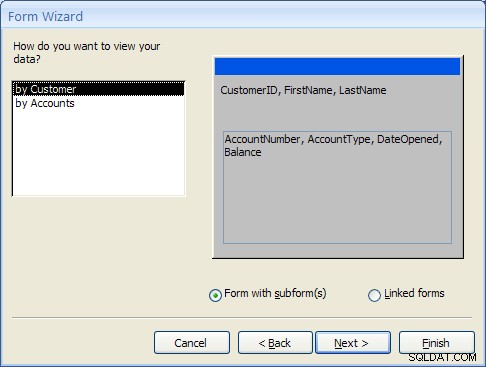
Click the Next… button to move to the next step. - At this point MS Access detects that this form will involve data from two different tables. The first prompt asks how the form should be organized at the top or “Master” level. The “by Customer” selection should be highlighted.The second prompt asks how the forms should be created. For this example, select “Form with Subform(s)” as shown below and click the Next… button to move to the next step.
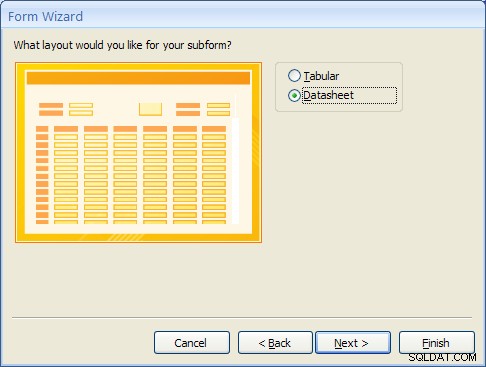
- The Subform is the form that will display the detailed data from the Accounts table. Selecting the “Datasheet” layout will make it easy for the user to view the multiple accounts a Customer may have. Select “Datasheet” and click the Next… button to move to the next step.
- For Access 2007, select the Office style and click the Next… button to move to the next step. (This step will not appear in MS Access 2010 or 2013).
- Finally, give the main form the name “CustomerMasterForm” and the Subform the name “Accounts Subform”.
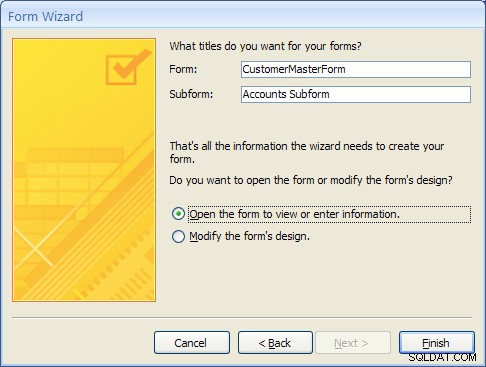
- After clicking on the Finish button the new Master/Detail form will appear as shown below.
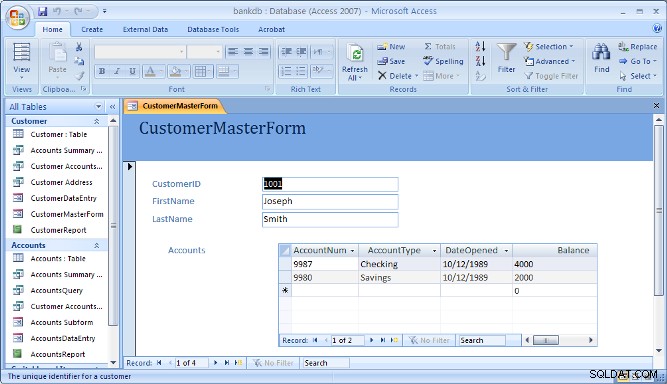
Note that the navigation bar at the bottom of the form is used to navigate through the records in the Master (or top) part of the form.
10 Creating and Running a Switchboard
A Switchboard is a type of form that displays a menu of items that a user can click on to launch data entry forms, reports, queries and other actions in the database. A switchboard is typically created after all of the forms and reports for a database application have been completed. It can be used to guide the user to an appropriate set of forms and reports.
Note that starting with Access 2010, Switchboards are not available by default (you will need to add this to the ribbon bar manually using the Options). Access 2010 and 2013 make use of the Navigation Forms.
In this section, a default switchboard will be created.
- From the Access main screen, click on the Database Tools tab and Click on the Switchboard Manager as shown in the figure below.

If this is the first switchboard made for this database, you will be prompted to create a new one as shown below. Click the Yes button.

- The Switchboard manager will appear as shown below:
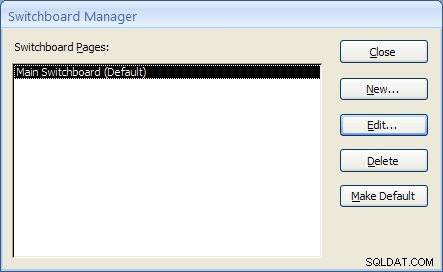
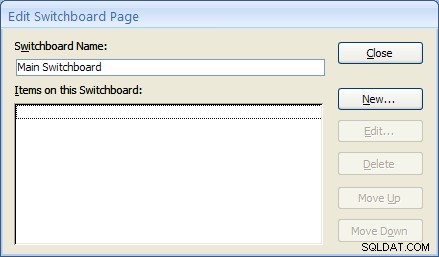
- Click on the Edit menu to edit the “Main Switchboard”. The Edit Switchboard Page will appear as shown below:
- Add a new switchboard item by clicking on the New… button. The Edit Switchboard Item form will appear as shown below. Fill in the fields as follows:
Text: Customer Data Entry Form Command: Select Open Form in Edit Mode from the drop down list. Form: Select the “CustomerDataEntry” form from the drop down list. 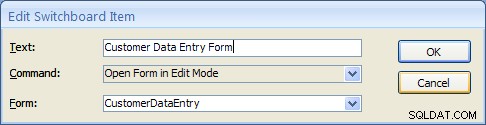
Click on the OK button to save this new Switchboard item.
- Repeat the above step two more times to add Switchboard items for the Accounts DataEntry form and the Customer Report.
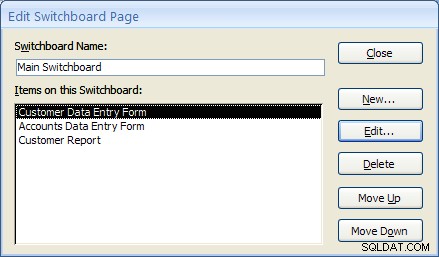
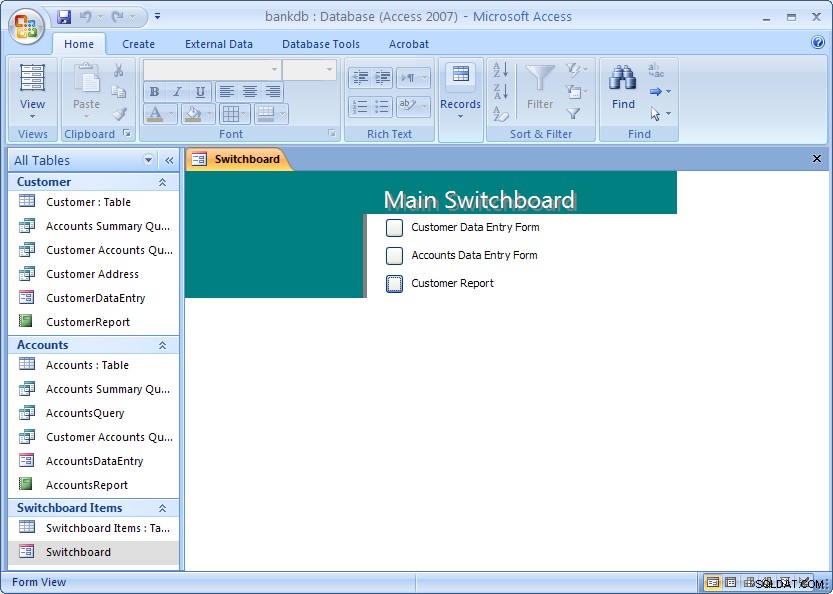
Once completed, click the Close button. Then click the Close button once more to close the Switchboard manager. - From the main MS Access screen look for a new section labeled Switchboard items. To view the switchboard, double-click on name “Switchboard”.
The next section covers creating a Navigation Form which is the recommended navigation screen for MS Access 2007, 2010 and newer versions.
11 Creating and Running a Navigation Form
MS Access 2010 introduced a new form called a Navigation Form. Navigation forms take the place of Switchboards but provide much the same functionality. Namely, they are designed to give the user the ability to run forms and reports without having to hunt through all of the different menus and lists objects. Typically a database application will have one main Navigation form that will appear when the database is opened.
In this section, the basic steps for creating and running a Navigation Form in MS Access 2010 will be demonstrated.
A Navigation Form is another type of form in MS Access 2010 and 2013
- To get started, click on the Create tab on the Access 2010 or 2013 ribbon bar. Under the section for Forms look for the item labeled Navigation Form. Note that this may be located on the button labeled Other Forms.
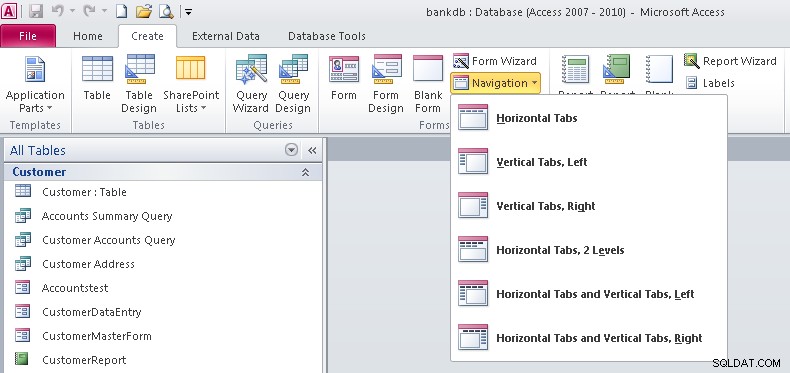
- Note that there are 6 different default styles of Navigation Forms. Each one places the buttons in a different configuration on the screem. Buttons can be aligned across the top, either side or some combination.For this tutorial select the Horizontal Tabs configuration which appears as the first item on the list.
- At this point a new Navigation Form will be created with a row of tabs across the top. The first tab will be labeled [Add New]
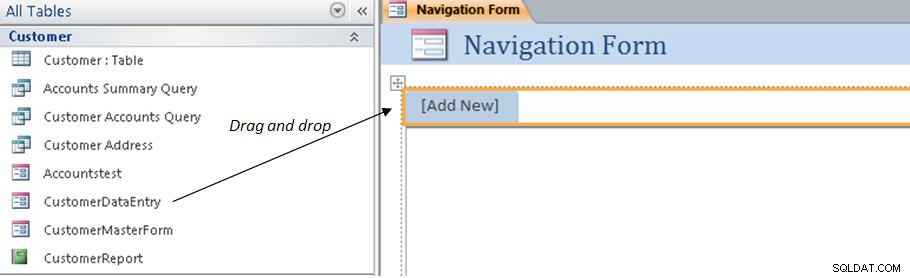
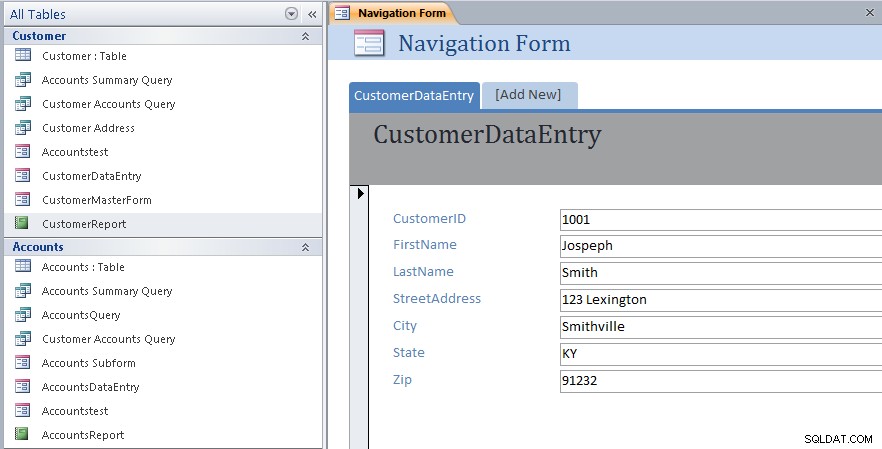
- To add items to the Navigation form, drag the items from the list on the left over to the spot on the Navigation Form labeled [Add New]. This is shown by the arrow in the above figure. For example, drag over the CustomerDataEntry form to the Navigation Form. The result is shown below.
- Next drag and drop the CustomerMasterForm as shown below.

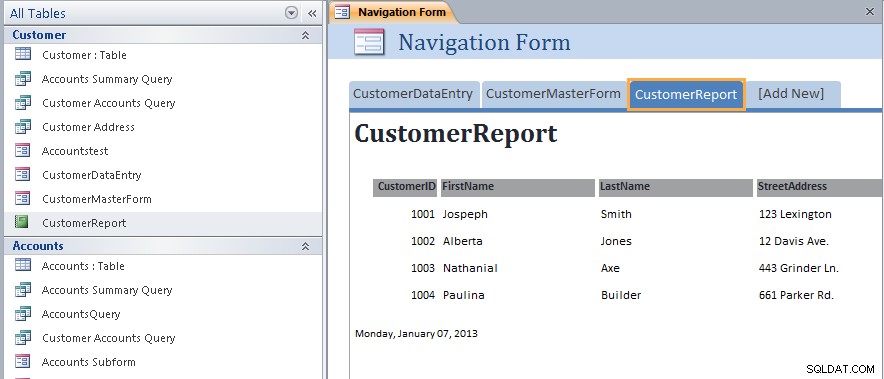
- Next drag and drop the CustomerReport as shown below.
- At this point we have created a new navigation Form and added three items along the top of the page. Save the Navigation Form by right-clicking on the name of the form and choosing Save as shown below:
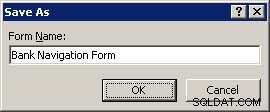
- Name the Navigation Form:Bank Navigation Form and click the OK button.
- Close up the Navigation Form by right-clicking again on the name of the form and choosing Close menu item.At this point the new Navigation Form has been created and saved. The next step will be to view the Navigation Form and navigate the different forms and reports linked to it.
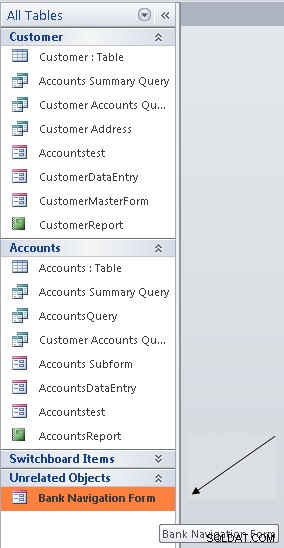
- To view the Navigation Form, look for the Unrelated Objects group on the left side of the screen. Double click on the Bank Navigation Form item as shown below:
The Navigation Form will appear: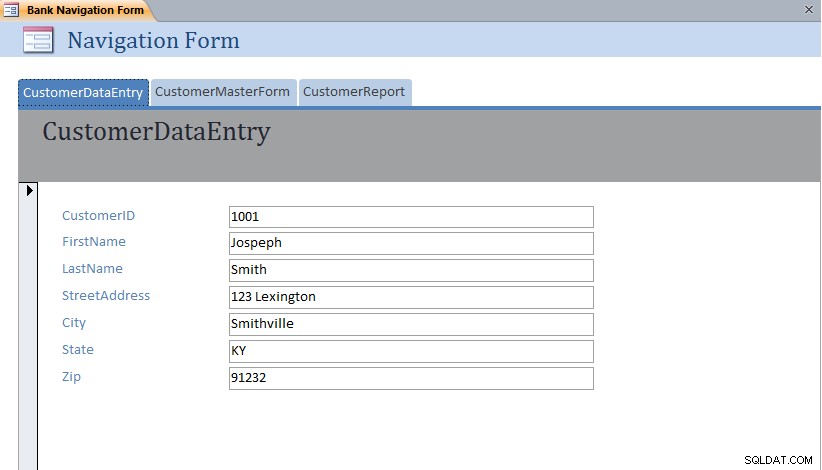 Note that each form or report can be displayed simply by clicking on the different tabs across the top of the Navigation Form.
11.1 Exercise:Modifying a Navigation Form
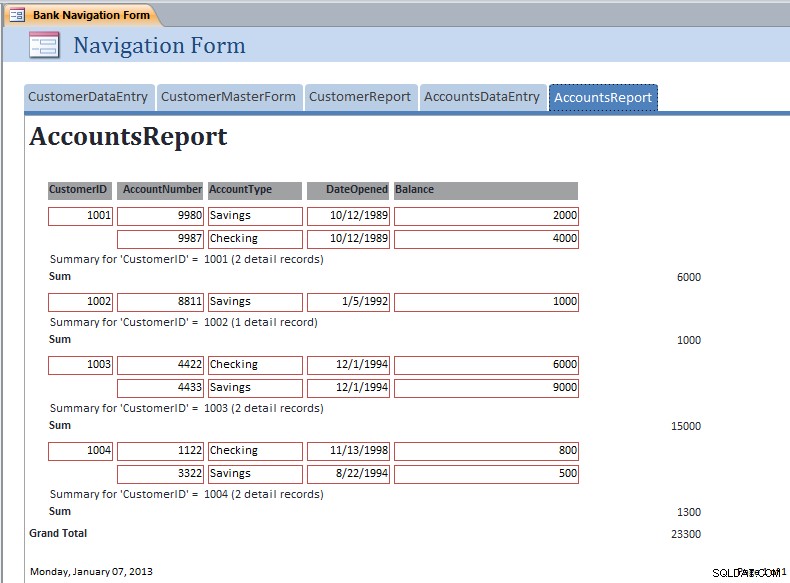
For this exercise, edit the Bank Navigation Form in Layout View and add the following new items to the Navigation Form:
- AccountsDataEntry
- AccountsReport
The resulting Navigation Form should appear as below with the AccountsReport opened:
11.2 Setting the Navigation Form as the Default
MS Access 2007 and 2010 (as well as earlier versions) have the ability to set a default form that will open up automatically once the MS Access data file is opened. This is especially useful for end users so that they always see the same form when they open up the database.
To set the Default Form, pull down the File menu and select the Options menu item.

The Database Options form will appear. Click on the Current Database item on the left hand side.
Under the Application Options heading, look for the Display Form:prompt and set this to the Bank Navigation Form as shown below:
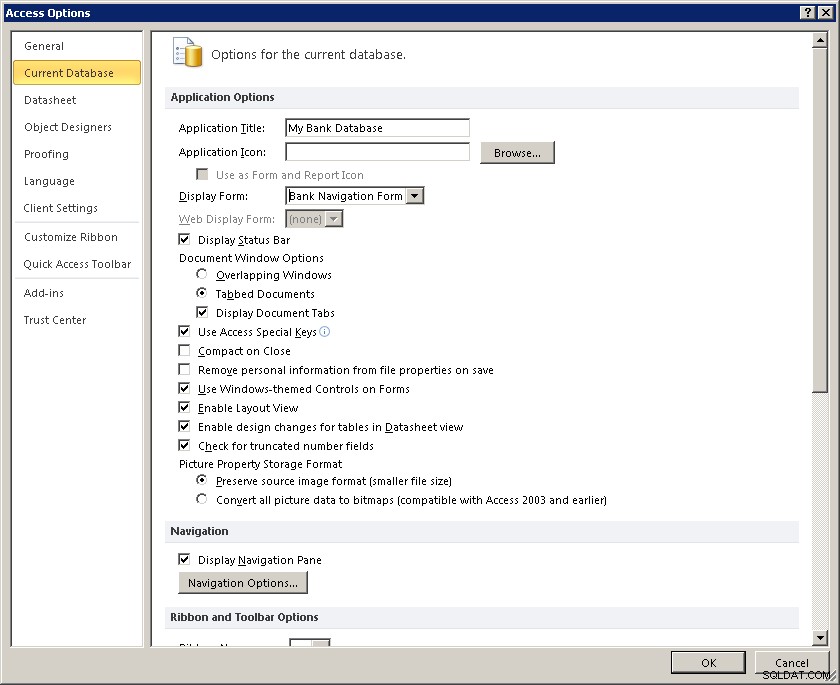
Click on the OK button to close up the Database Options screen.
The next time this database (bankdb.accdb) is opened, the Bank Navigation Form will open up.
12 Tutorial Summary
In this tutorial, we have covered the basics for creating an Access database including tables with data, queries to retrieve data, forms to enter data and reports to display and summarize data.
Students are encouraged to further their Access knowledge and skills by working through more advanced tutorials such as Advanced Access Database Table Design and Advanced Access Forms Design, and by reading the on-line help and Access documentation.
You may also be interested in this tutorial that covers up-sizing the Access database to Microsoft SQL Server using the Microsoft SQL Server Migration Assistant.